Page 10 of 12
Posted: 29 Oct 2015, 12:24
by andrewjoy
My 107 has it , works just fine , in fact it dampens some of the vibrations better than a standard F space bar.
Posted: 29 Oct 2015, 13:39
by fohat
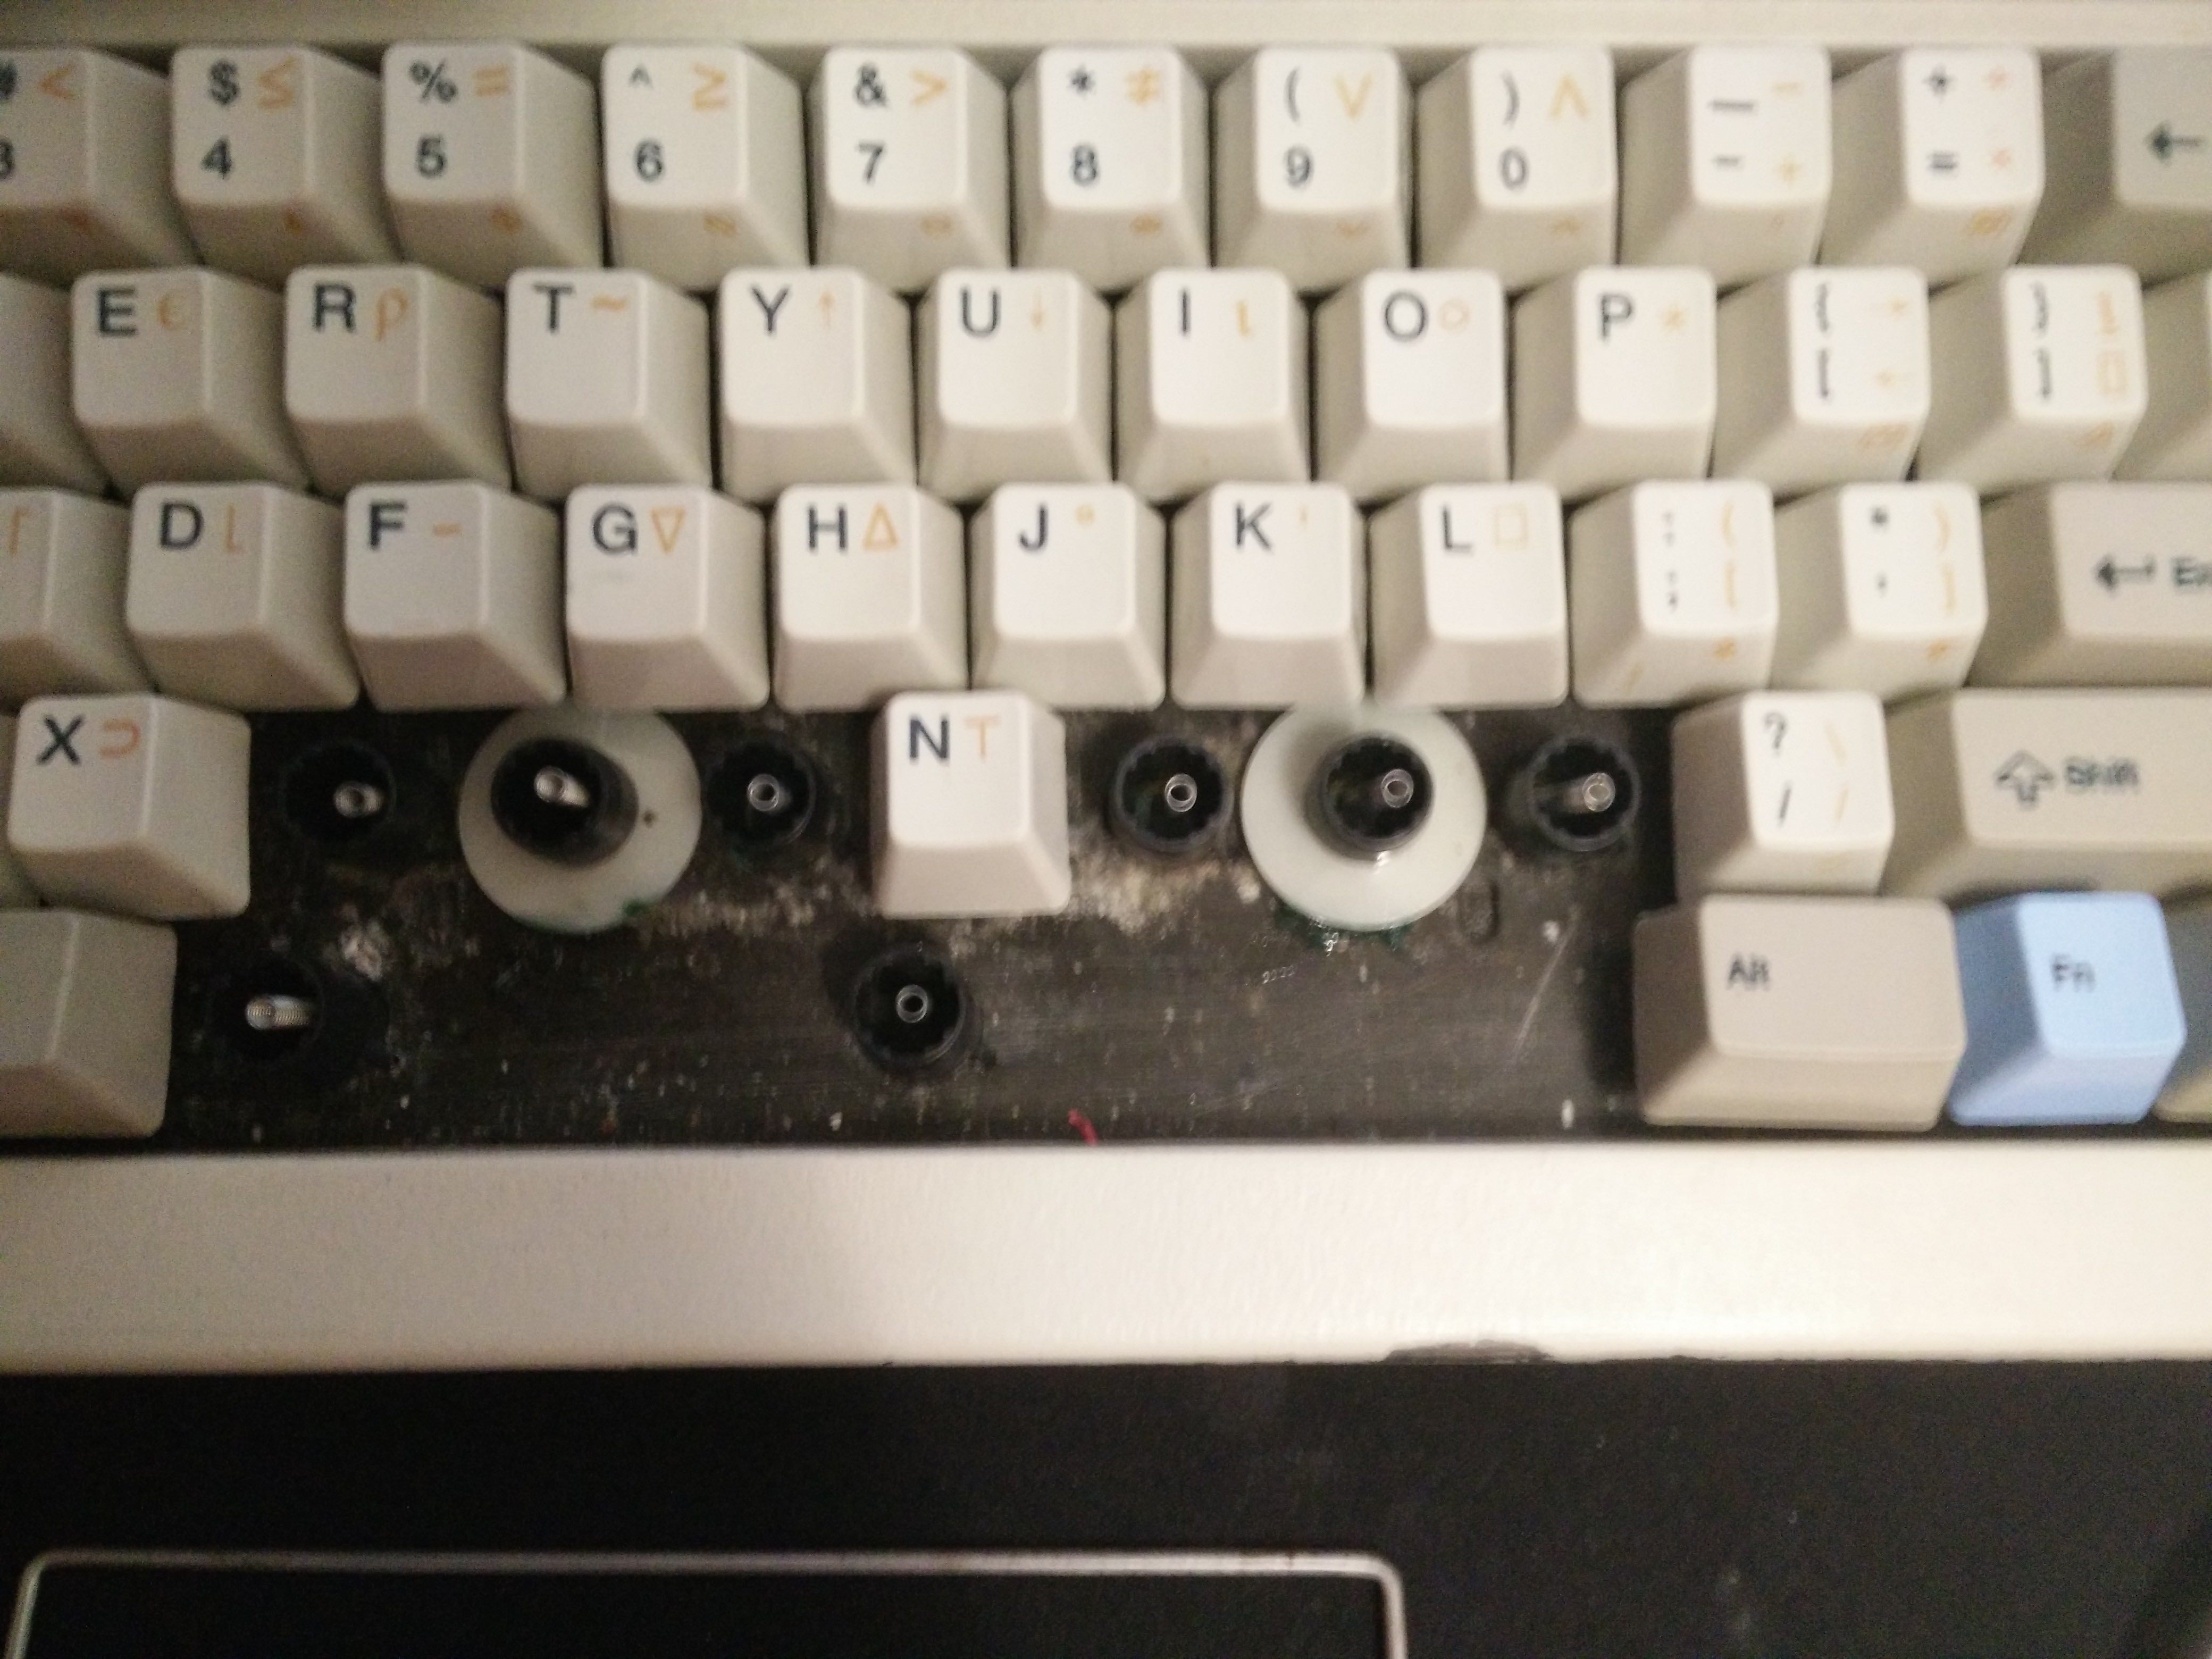
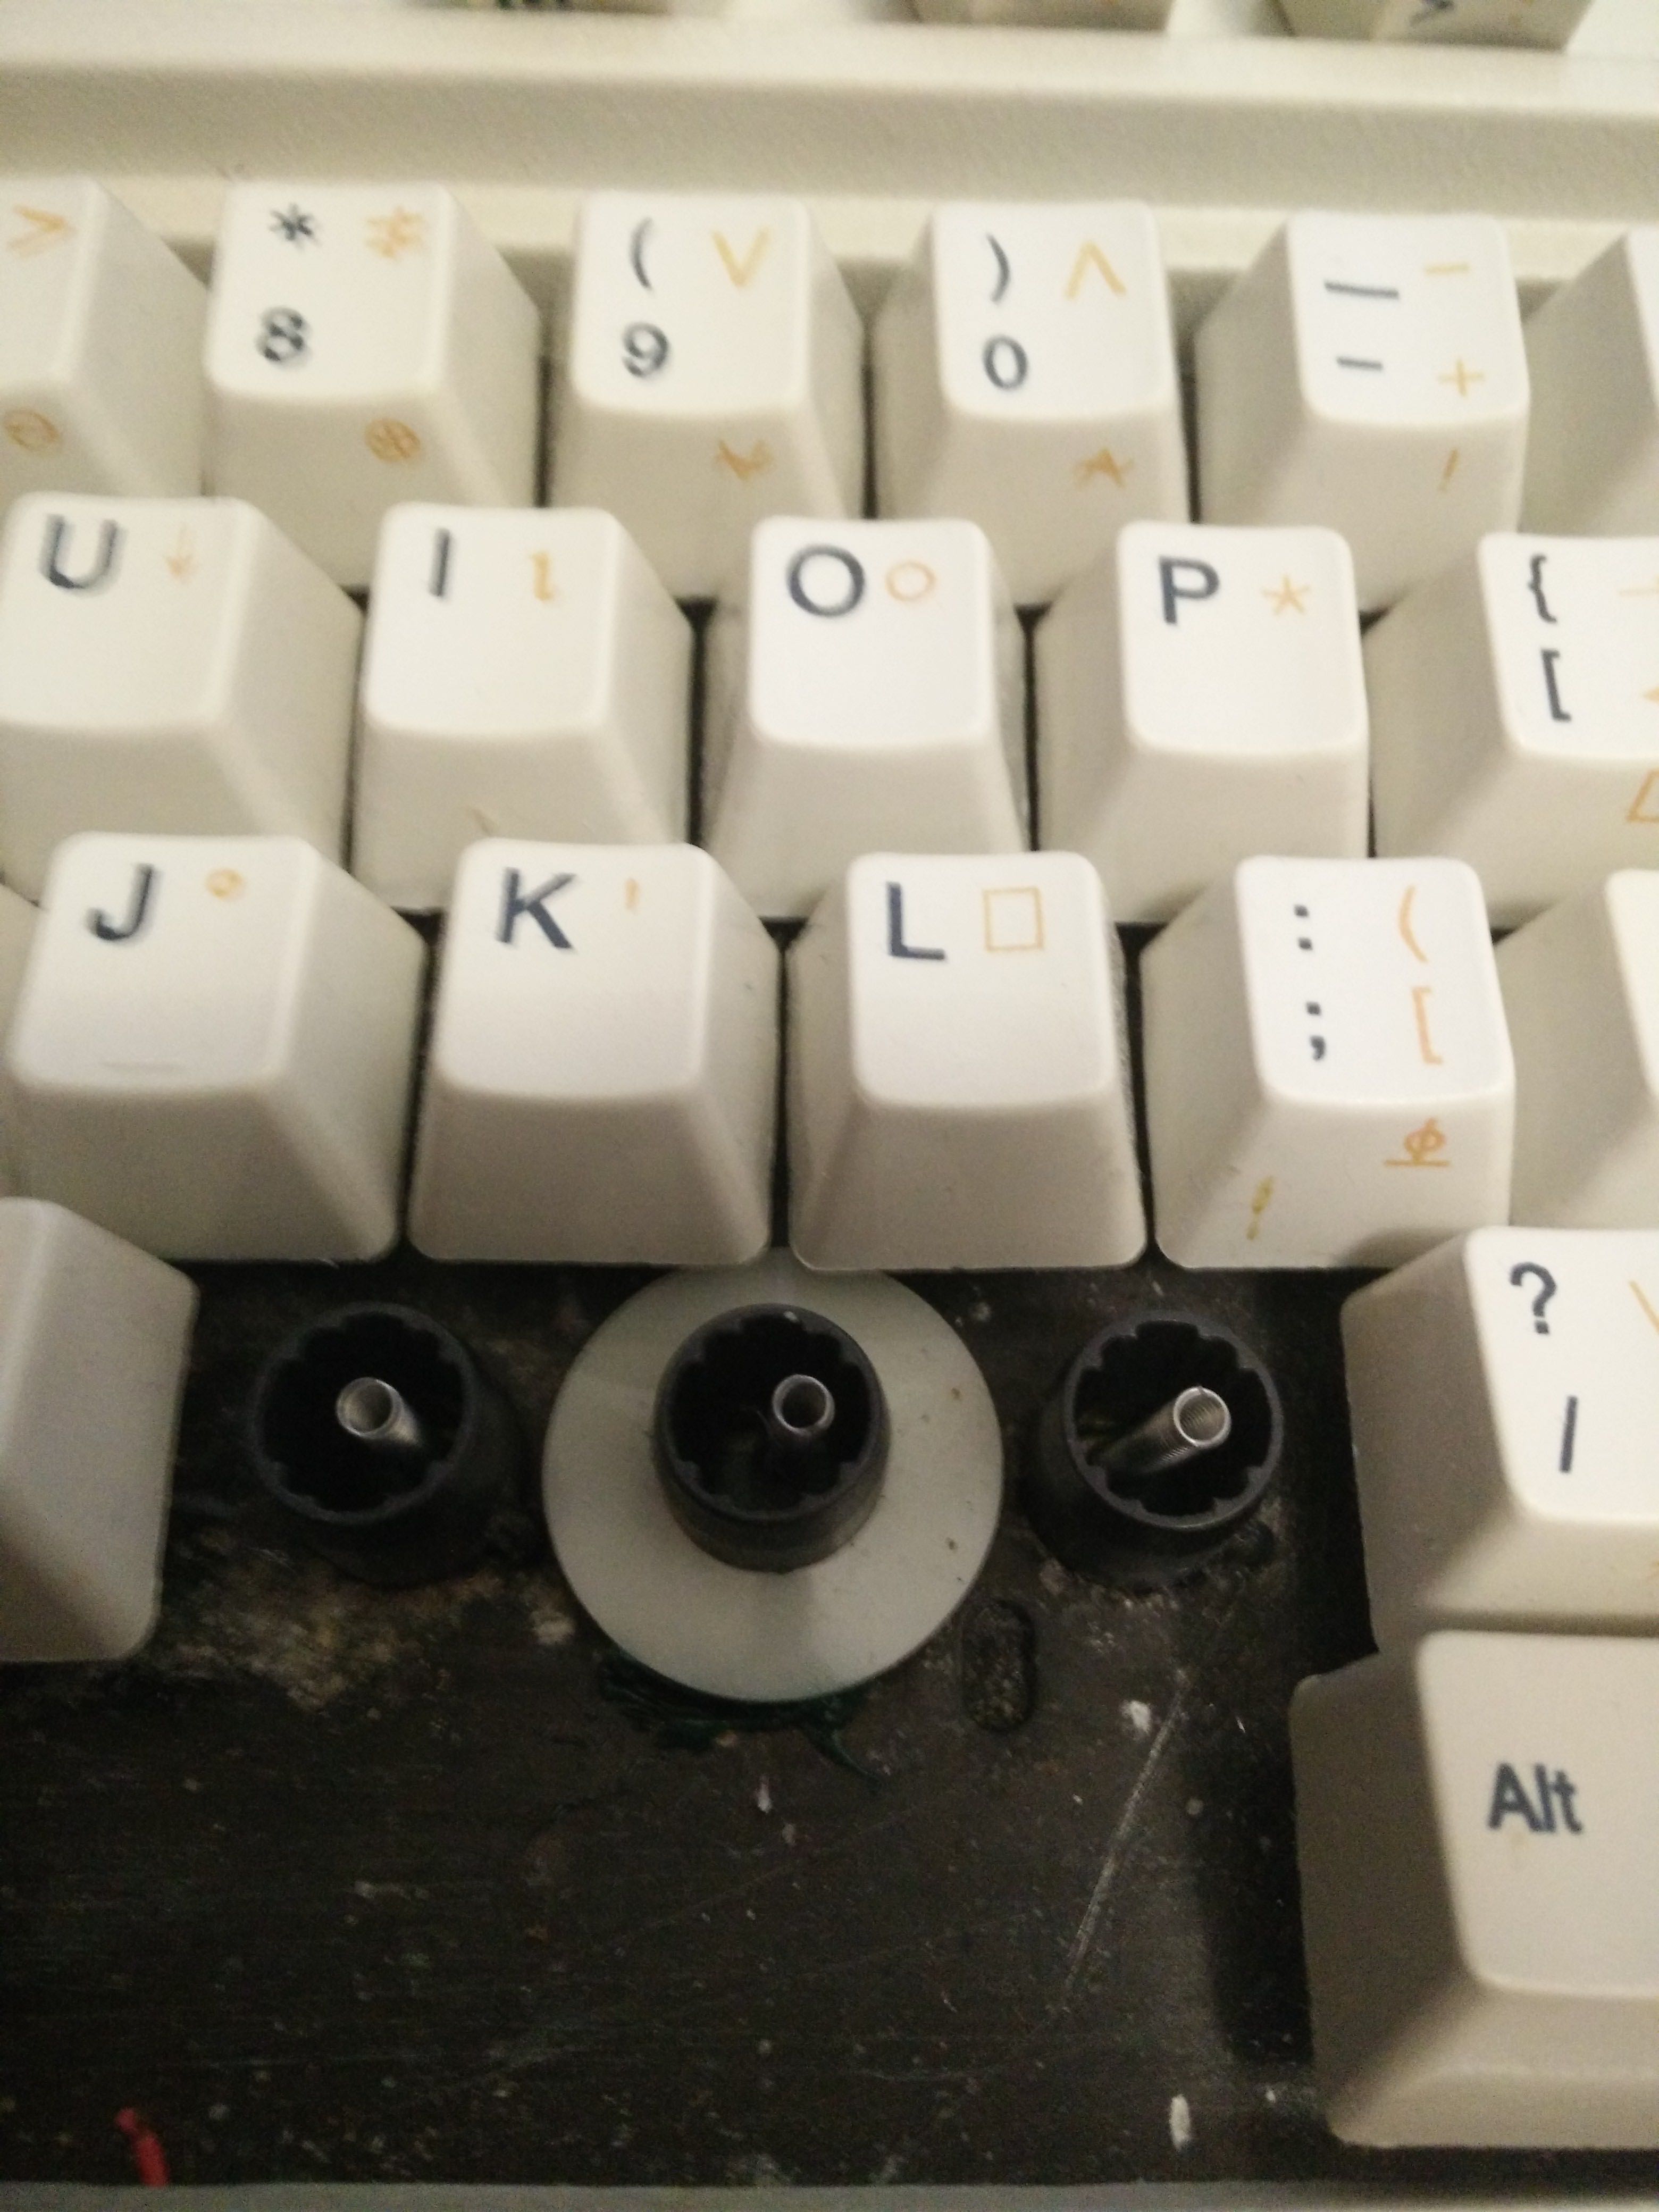
Muirium wrote: By the way, how are you guys finding the washer spacebar stab trick in practice?
Mine rattles a bit and doesn't like to be hit at the extreme ends.
I have been thinking about solutions - first I will try a 3rd washer, then I may tether down the back side of the washer to the plate with a thin slice of black electrical tape.
Posted: 30 Oct 2015, 02:20
by vivalarevolución
fohat wrote: Muirium wrote: By the way, how are you guys finding the washer spacebar stab trick in practice?
Mine rattles a bit and doesn't like to be hit at the extreme ends.
I have been thinking about solutions - first I will try a 3rd washer, then I may tether down the back side of the washer to the plate with a thin slice of black electrical tape.
My experience has been about the same as this.
I will be posting some of the findings from my assembly when I have time. Got some of those real life situations taking precedence right now.
I'm also considering doing another run of this project, although I think that I need to modify the specs on the plate and find a local plate fabricator.
Posted: 30 Oct 2015, 10:56
by andrewjoy
I dont know what you guys used but mine has plastic washers that are tight on the barrels and don't move
Posted: 30 Oct 2015, 11:42
by Muirium
Aha! Tell us more of these plastic washers… a link would be nice.
Posted: 30 Oct 2015, 11:46
by andrewjoy
I did not install them , they came with it

Posted: 30 Oct 2015, 11:49
by Muirium
Aw booger.
The metal ones the rest of us are on about are too loose and rattly. How about some pics? We need to make something more like what you lucked into!
Posted: 30 Oct 2015, 11:52
by andrewjoy
I will sort some out for you tonight
Posted: 30 Oct 2015, 12:04
by Muirium
Appreciated. Wcass's idea is sound, but I've not had luck getting it to work right on my single stabbed Kishsaver. The right mount is broken, so the left side of the spacebar wobbles. I hit the right side anyway, so not much of a problem. But I want it perfect, of course. When I add a washer or two to the unstabilised wire, rattle rattle rattle. It's a Model F spacebar, mind. So I wanted to know how the concept is working out as Wcass intended, rather than my half measured kludge!
Come December, I'll be working on my XTant, which needs it for real. No other stabs there. But right now, it's a third of the world away.
Posted: 30 Oct 2015, 22:51
by vivalarevolución
One thing I would make sure is maintain that clear plastic sheet as a layer between the PCB and backplate. I first assembled mine without the sheet, and I think it causes some capacitance issues. When I started typing, everything was fine. After awhile, the keyboard would start firing off random keypresses and be especially crazy when I unplugged the keyboard. Don't ask me why.
Everything is fine right now. We'll see if those random keypresses rear their ugly head again.
UPDATE: Nevermind, I'm still getting the same issue with the random keypresses after awhile. Not sure what the exact issue is, but it has to be one of the electrical components like the PCB, controller, or something else. It's weird. Everything is fine for awhile, and then I start to get random keypresses.
Posted: 02 Nov 2015, 20:33
by fohat
Muirium wrote: Aha! Tell us more of these plastic washers… a link would be nice.
I just bought some neoprene washers at the local hardware store and they are working so far.
You noise boys won't be too happy because it dampens the sound of the space bar (they are just gigantic O-rings after all) and shortens the stroke, and also the key with the washer at its base.
edit - Now that I have used it for an hour I am less enthusiastic. The rattle from the steel washer is gone, and the action of the stabilizer is great, but the dampening effect is too pronounced. I want to try a nylon or fiber washer in a thickness of no more than a millimeter.
What I bought, here in the US of course in Imperial measure, are 3/8" inside diameter, 1" outside diameter, and 1/16" thick, which equates to about 10mm x 25mm x 1.5mm. They are fairly stiff and have to be stretched slightly over the barrel (aka chimney) but then they stay in place. I would love to find some a little thinner, but if they weren't somewhat heavy they might not do keep the wires down very well.
Posted: 03 Nov 2015, 21:29
by andrewjoy
Muirium wrote: Aha! Tell us more of these plastic washers… a link would be nice.
https://photos.google.com/share/AF1QipO ... 1SdGk4S0Zn
I will upload a video for sound as well its just syncing to Google photos as we speak
EDIT
This is a video for sound sorry for the shitty quality but Google photos will not let me download it and put it on YouTube for full 4k awesomeness
https://goo.gl/photos/u89W5mZcJhDuFjB26
Posted: 03 Nov 2015, 21:42
by Muirium
Your braindead Google links
piss me off even more than thumbnails. Don't make me repeat myself today!

Sigh.
Posted: 03 Nov 2015, 21:47
by andrewjoy
Muirium wrote: Your braindead Google links
piss me off even more than thumbnails. Don't make me repeat myself today!
Sigh.
I would fix them and upload the images but i have no idea how you reduce file size of images quickly in windows.
I need Preview !
Posted: 03 Nov 2015, 21:49
by scottc
MS Paint!
Posted: 03 Nov 2015, 21:49
by jbondeson
andrewjoy wrote:
I would fix them and upload the images but i have no idea how you reduce file size of images quickly in windows.
I need Preview !
Try
Paint.NET.
Posted: 03 Nov 2015, 21:50
by andrewjoy
I should install that yes, but it should be a standard option in the default image viewer of your OS.
EDIT
Anyway to keep Mu Happy
Posted: 04 Nov 2015, 23:40
by fohat
Continuing, I was happy at first with the 3/8" neoprene washers but grew disenchanted with them because they were too tall (thick) and made the keys under them feel funny. I had to force and stretch them down into place, but that seemed good. (that sentence would draw snarky comments on GH)
They seem to be the same thickness as my original 7/16" SAE stainless steel washers, and I never felt that issue, presumably they "rocked" out of the way.
Today I got some 7/16" ID x 7/8" OD fiber washers that seem to be a good thickness, but were a little bit to tight to fit over the barrels (chimneys) so I reamed them out with the Dremel. I felt that they still needed to be pretty snug since they weigh less than the steel ones.
These are another improvement, since they don't rattle and the ends of the spacebar are stabilized, but they still inhibit the downstroke of the keys that they surround. Next step:
Find a small file and file out notches where the buttresses occur so that the washer can slide farther down the barrel.
PS - what are the specs for the nylon washers? something on the order of 9mm ID x 20mm OD x 1mm thick?
Posted: 05 Nov 2015, 04:05
by vivalarevolución
I'd like to report that I have a 2nd XTant assembled and working properly, this time with a PCB from my run of PCBs. I included a 1/16" foam mat in the internals, and it has a tighter, less rattly feel than my first XTant with the foam mat (as expected).
My first XTant with wcass's original PCB is still on the shelf with an unresolved issue of firing multiple keypresses after an extended period of typing.
Posted: 05 Nov 2015, 11:03
by andrewjoy
fohat wrote: Continuing, I was happy at first with the 3/8" neoprene washers but grew disenchanted with them because they were too tall (thick) and made the keys under them feel funny. I had to force and stretch them down into place, but that seemed good. (that sentence would draw snarky comments on GH)
They seem to be the same thickness as my original 7/16" SAE stainless steel washers, and I never felt that issue, presumably they "rocked" out of the way.
Today I got some 7/16" ID x 7/8" OD fiber washers that seem to be a good thickness, but were a little bit to tight to fit over the barrels (chimneys) so I reamed them out with the Dremel. I felt that they still needed to be pretty snug since they weigh less than the steel ones.
These are another improvement, since they don't rattle and the ends of the spacebar are stabilized, but they still inhibit the downstroke of the keys that they surround. Next step:
Find a small file and file out notches where the buttresses occur so that the washer can slide farther down the barrel.
PS - what are the specs for the nylon washers? something on the order of 9mm ID x 20mm OD x 1mm thick?
When i find my calibers i will let you know
Posted: 05 Nov 2015, 14:48
by fohat
andrewjoy wrote: fohat wrote:
PS - what are the specs for the nylon washers? something on the order of 9mm ID x 20mm OD x 1mm thick?
When i find my calibers i will let you know
I was hoping to order some on ebay, and "nominal" sizes and "actual" sizes are not always the same!
In Imperial measure, "low-end" washers are usually sold in ID and OD specs, with the thickness left rather vague.
Posted: 05 Dec 2015, 04:01
by vivalarevolución
For all those that bought an XTant PCB from me: I finally have a working black ink cartridge, and I will be creating some labels and shipping them out soon. I'm send some messages soon to all those that will be receiving an XTant label for the run of PCBs.
On another note, I was wondering if anyone could help me modify the DXF file for the XTant barrel plate. I'm finding the original file to be a tad too large to fit inside the original XT case.
Posted: 05 Dec 2015, 04:46
by wcass
I might be able to help with that.
I removed 0.05" from each side and rounded the corners so it would be less pointy.
Posted: 05 Dec 2015, 06:22
by vivalarevolución
wcass wrote: I might be able to help with that.
I removed 0.05" from each side and rounded the corners so it would be less pointy.
Wonderful. I found the sides to be just right but the top and bottom edges a little too excessive.
I thought about teaching myself a little of the free, open-source CAD resourcrs on the Interwebs to do the adjustment myself, but that would not be for a few months.
Posted: 05 Dec 2015, 12:44
by Muirium
Have I got PCB filing lying in store for me?
Posted: 05 Dec 2015, 12:59
by vsev
Damn I really wish I had ordered one at time, this is some stunning project for sure !
Posted: 05 Dec 2015, 14:56
by vivalarevolución
Muirium wrote: Have I got PCB filing lying in store for me?
Please reword. I do not know what you are asking.
vsev wrote: Damn I really wish I had ordered one at time, this is some stunning project for sure !
I plan on doing another run when I have time. Most likely in the new year when I have less responsibilities than I have now.
Posted: 05 Dec 2015, 14:58
by Muirium
I mean my PCB was made ages ago. It's been waiting in California for my visit, along with the donor XT. Will I have to modify the PCB to make it fit?
Posted: 08 Dec 2015, 14:58
by vivalarevolución
Muirium wrote: I mean my PCB was made ages ago. It's been waiting in California for my visit, along with the donor XT. Will I have to modify the PCB to make it fit?
Oh no, the PCB should fit fine with the plate. When all the internals are assembled, I had some issues with the fit in the case. Wcass has adjusted the barrel plate file to improve the fit inside the case.
Posted: 10 Jan 2016, 18:51
by vivalarevolución
Okay guys, life has slowed down a little bit and I finally had some time for my lingering XTant builds. I mentioned earlier in the thread about some issues I had with the assembled internal sandwich (plates, PCB, switches, and springs) fitting well inside the case. When assembled, the top row of keycaps would rub against the edge of the case. On the bottom row of keycaps, there was plenty of clearance between the keycaps and the case.
Wcass and I have discussed this issue through messages, and he did change the specifications of the barrel plate file to allow proper clearance to prevent any keycaps from rubbing against the case. So if there are future runs of the XTant barrel plates and PCB, the problem I am describing should not occur. However, if you received a plate from me, you may have the keycaps-rubbing-against-the-case problem.
In the meantime, I still had the original barrel plates from our tiny group buy and did not want to pay for new ones, so I decided to work with what I had. I tried a couple different methods to give the top row more clearance (adjusting screws of the internal assembly, crudely forcing the internal assembly to sit lower), and while this worked with one or two keyboards, it did not work for all. I needed a more universal solution.
My somewhat labor intensive solution was to file down the standoffs on the bottom edge of the case where the internal plates rest against the case. All I needed to do the job was a somewhat coarse mill bastard file. So I killed some time while watching the NFL playoffs and starting filling away.
Medium story short, it worked and all of my XTants now have enough clearance on the top and bottom of rows of keys without any keys getting stuck. So I finally have my XTant working properly, which is nice.