If you want to play along at home, set your grid spacing to 1.875x1.875, turn off dynamic grid, enable snap to grid, and use flowchart boxes as keys. Minimum key size is 4 grid units by 4 grid units - this is a 1x1 key. Can't really do an ISO enter that way, or an L-shaped ANSI enter, but those can be done using two keys.
All of the layouts I'm drawing are ANSI, but are sized so that an ISO enter will work in the same layout, with one exception (1 unit for the lower part of the ISO enter).
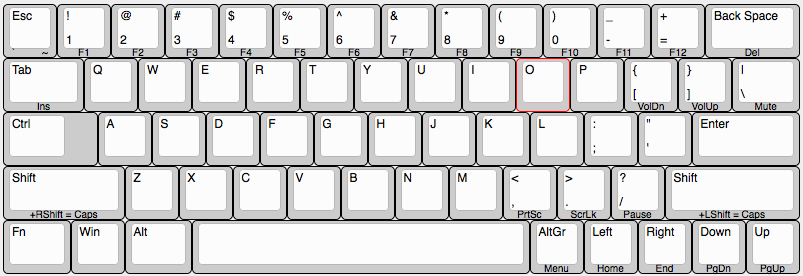
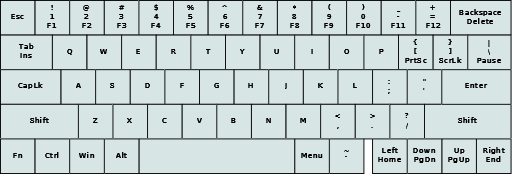
Let's start with a layout we're all familiar with:

I don't need to explain that at all.
Let's chop some off of it:
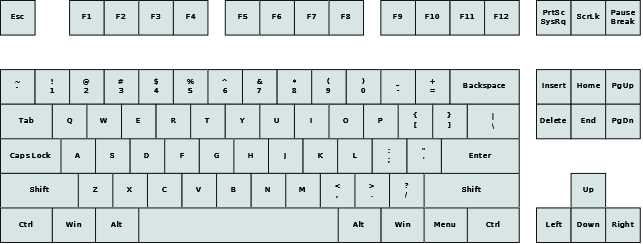
Better, but some people actually like having a numpad. And, everyone's done this.
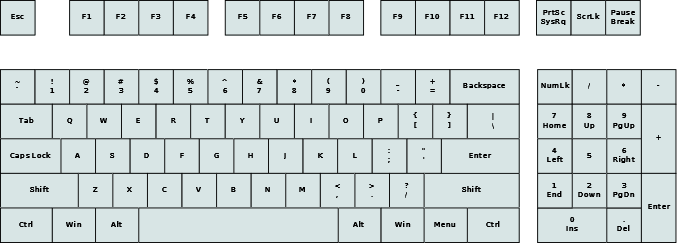
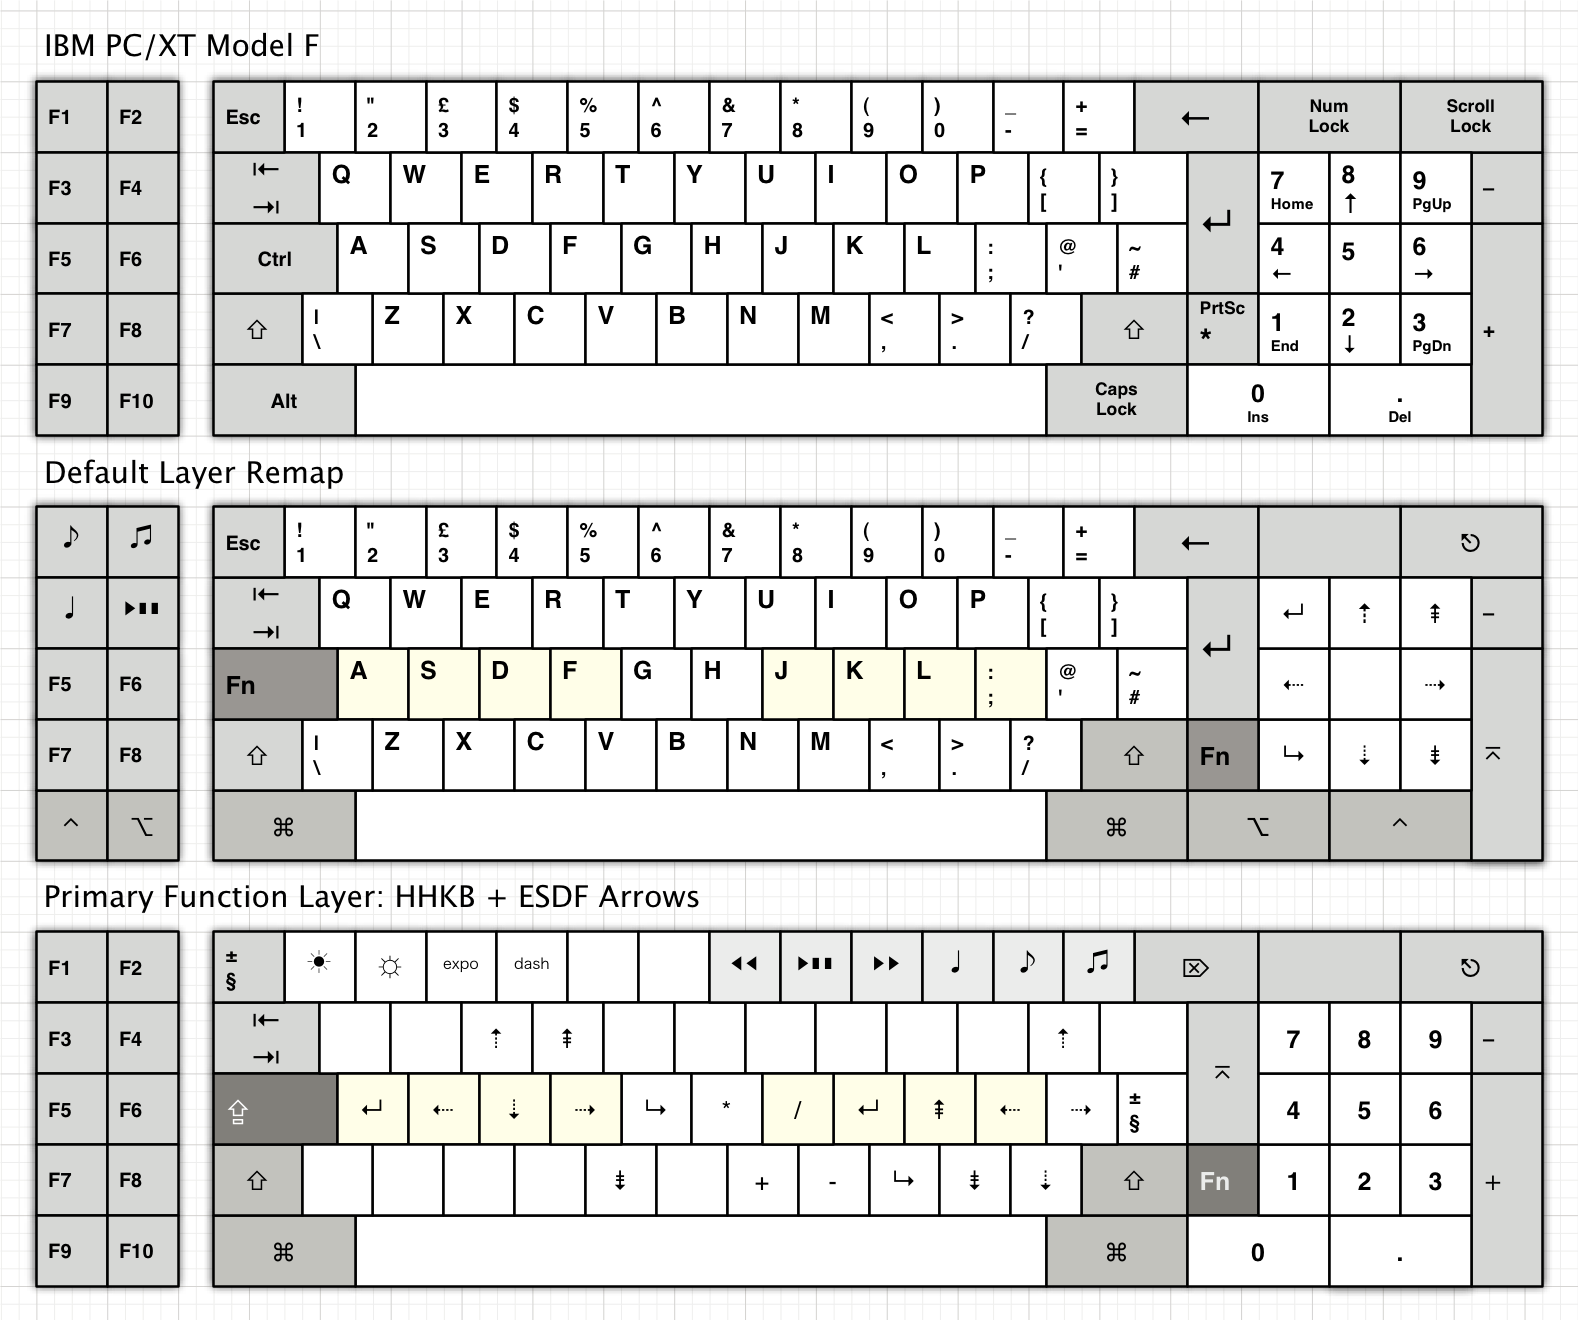
Stealing some ideas from ye olde XT and AT. Cooler Master's actually done a variation on this, the QuickFire TK, which rearranges the keys when Num Lock is off, and also has a Fn layer (to move the Print Screen, Scroll Lock, and Pause keys out of real keys).
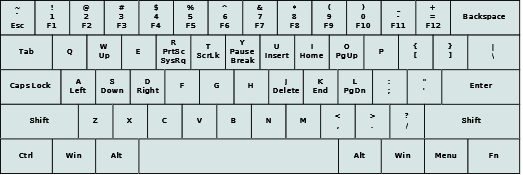
But, what if you want something smaller?
Let's steal some ideas from older ThinkPads and Latitudes, but tweaked to fit with 1x1 keys being the minimum size:

You might notice a subtle tweak I did to the width. See, you can pull 1/4 unit out of the right side of the keyboard, without losing anything, not even ISO compatibility.
That is rather tall, though... how about we give ourselves a Fn layer to play with?

Much better! Not much is hidden under the Fn layer, and the only commonly used keys under it are Home and End, and many laptops do that. This is actually inspired by most modern laptops. There is still the problem that the arrow keys are jutting down, but if you have a TrackPoint on this board, you'd need the TrackPoint buttons jutting down anyway, so it works.
But, what if you want something smaller?
Well, there's always standard 60% layouts:
This is how I'd probably map a standard 60%'s Fn layer, but you get the idea. And, I left the free 1/4 unit in, because that's what most keyboard designers doing a 60% do.
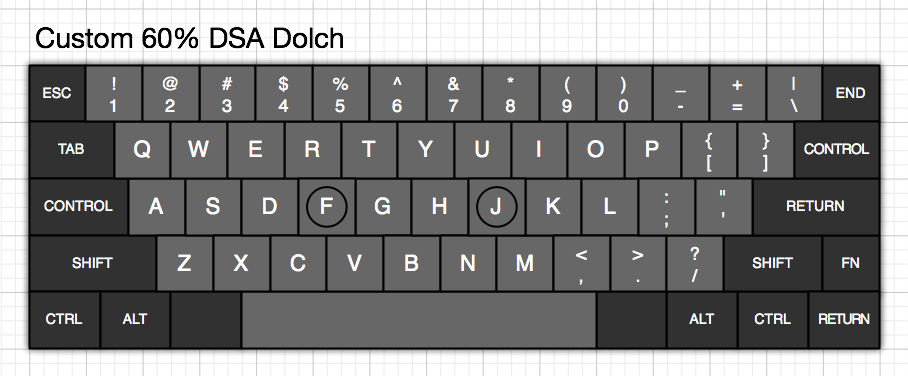
However, let's take a break to look at what I consider one of the greatest 60% layouts, the Apple //c's layout:

This pulled 1/4 unit more than I just did out of the normal layouts. Apple actually spun different PCBs for ANSI vs. ISO, I believe. I did JUST figure out a way to pull another 1/4 unit out of the right side of the keyboard and still work with ISO (would need remapping, though), even with a 3/4 unit wide bottom half of the ISO enter - use the ANSI backslash switch for ISO enter, use the ANSI enter switch for ISO backslash, and have a stabilizer that both enters use to the right of ANSI enter, bottom of ISO enter. But, I'll continue with the way I did it, it gives more room for stabilizers anyway.
In any case, this layout has arrow keys, and is generally competent. I'd change around the order of the arrow keys if I were doing such a layout, though. Later keyboards (the IIc Plus, IIe Platinum, IIGS, and Apple Keyboard) changed things around, and went to an L-shaped enter (causing some issues in the bottom of the keyboard that I really hate), and then another one (Apple Keyboard II) got things better (but put Esc down to the left of left arrow, where I would put `~, and was an absolutely atrocious rubber dome).
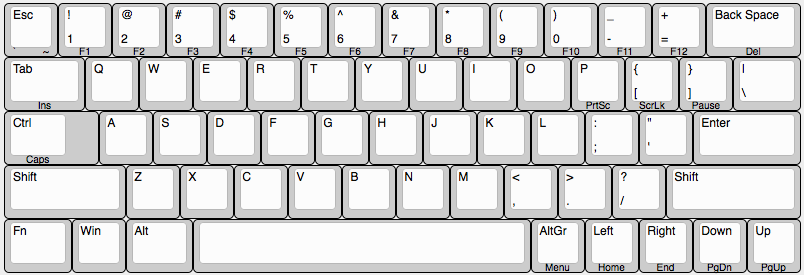
Now, for how I'd do a 60% layout:
And, you can see, there's plenty of room to pull out another 1/4 unit, without even losing spacebar width (although losing arrow key segregation) if you can get the key mounting right. It has every key you need, Fn use is minimized, yet it's slightly more compact than most current 60% layouts. Downside is the linear arrow keys, but at least they're there, and are in vi order, instead of the Apple //c order (which I find a bit awkward.)
Edit: And, this was completely accidental... all the keys necessary to make the 65US, or an equivalent 66ISO, exist, as standard DCS-profile keys. 4.5 unit spacebar, 1.25x2x1x1 ISO enter are the tricky ones.