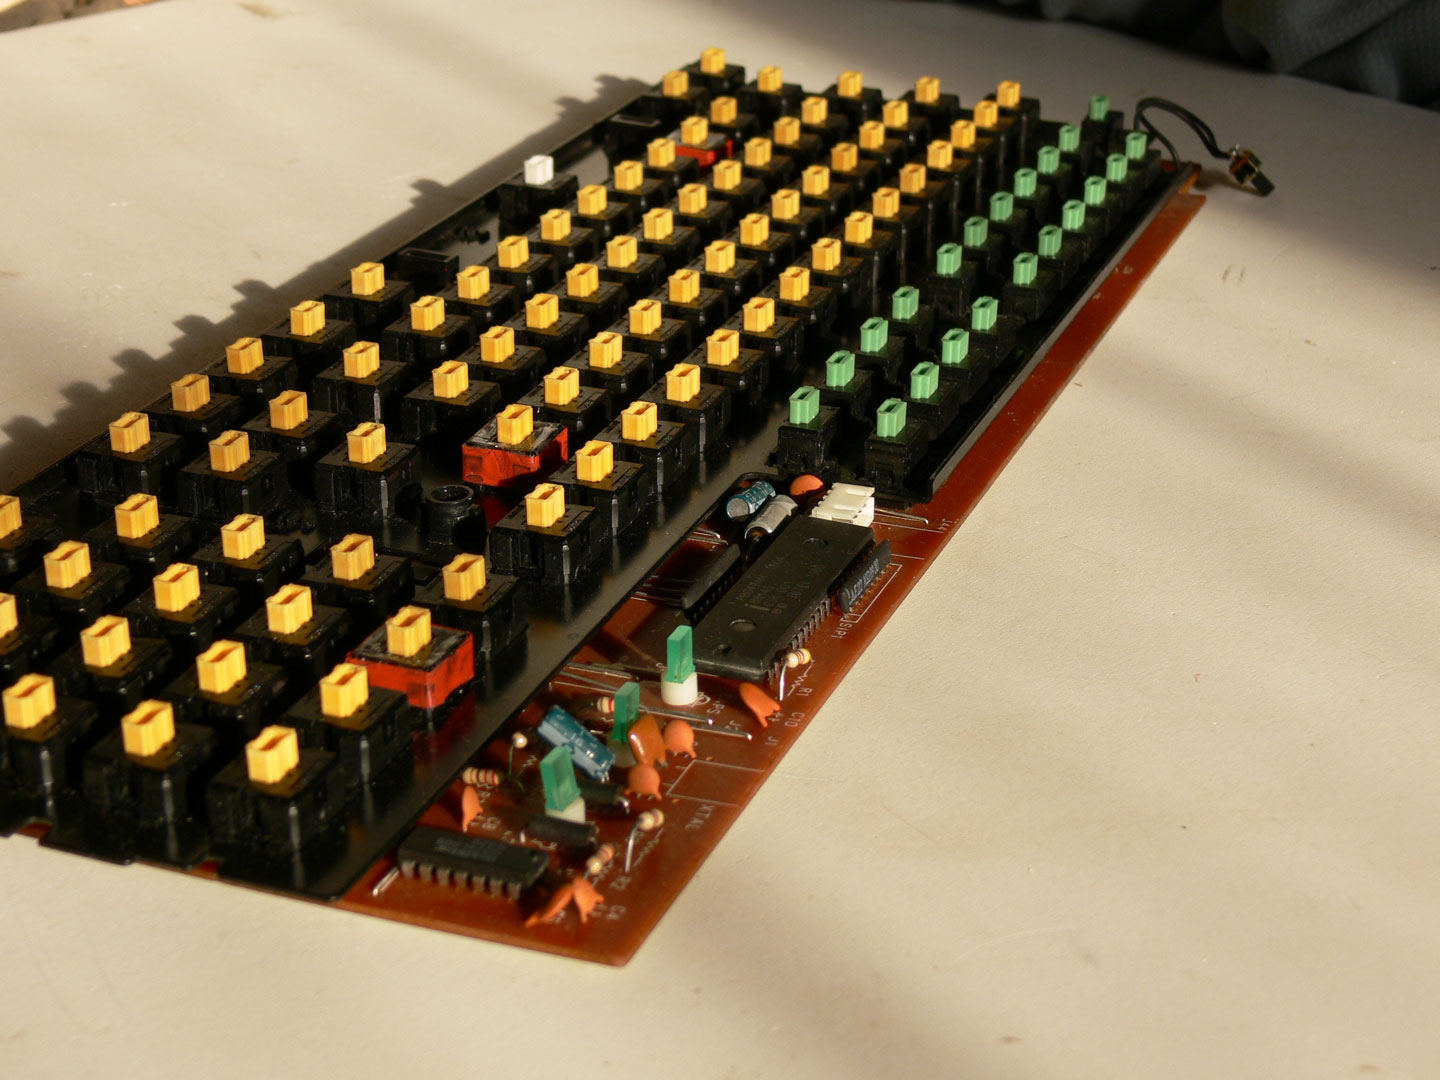
Costar CSK-1101P: Compact Layout, Omron Switches
- mbodrov
- Location: Moskva, Russia
- Main keyboard: Cherry G80-1853
- Main mouse: Logitech G5
- Favorite switch: MX ErgoClear
- DT Pro Member: -
http://www.kbdmania.net/xe/review/107648, but the pictures do not load anymore. So I am not sure if their example was the US ANSI layout - probably so; however it turns out it also existed in US/Cyrillic, which is what I have got.
This is the seller's auction photo:
All photos except this one were taken by me after I received and overhauled the keyboard, so you may notice that the yellowing is gone, etc.
The dimensions are about the same as the Cherry 1800, and probably both were designed with a similar application in mind, 19 inch rackmount equipment. Both the Cherry 1800 and this Costar CSK-1101P have all the keys of a full 101-key board. But Costar had a different idea of how to fit them within the 19 inch footprint.
Note the two rows of downsized function keys at the top.
I think some old laptops used similar keycaps; for example:
Being a prominent feature of this keyboard, I think they deserve a closeup:
The downsized keys are in two clusters of two rows each. One cluster contains F1-F12 (and Esc sits there by its side), the other has the navigation keys (Insert, Home, ...) plus Pause and PrtSc. Curiously, the all-important Scroll Lock got a full size keycap next to NumLock (see the first picture.)
The full size keys are the usual vintage white-and-grey, but the small keys are all grey.
The 1 unit Backspace and BIGass Enter are typical for Taiwan-made keyboards of the era.
Key profile:
This is the standard ABCDE profile. Obviously, there is no F.
Back side of the keyboard:
Closeup of the label:
Costar Electronics, Inc.
Model: CSK-1101P
S/N: № 89006191
Date:
FCC ID: GS23TYCSK-1101P
Wow, even a serial number! Everything just like the big boys!
The sticker that has been placed over the label reads: "Sigma System Computer Ag. Serial No: 501011. Warranty void if removed." Actually there is no screw or anything under this sticker.
Sigma may have been an integrated solutions builder who ordered these keyboards from Costar. Google, however, does not readily find this Sigma.
To open up the keyboard, you unscrew the 3 screws, then carefully pop 5 latches.
Worth noting are the collapsible feet, AT/XT switch, and the cable which can be routed out of the case through the left or right hole, whichever is more convenient. The coiled cable ends with a DIN-5 connector.
Another feature that I think is interesting is how the upper half of the case is larger than the lower half, and overhangs it near the front edge, forming a kind of a built-in hand rest:
Actually I am taking these pictures when I am finished with my work on this keyboard and in the process of putting it back together, but please allow me to post the pictures here in reverse order and pretend I am disassembling it.
Continued in the next post due to the limit of 10 attachments per post...
The Costar CSK-1101P is a vintage compact layout keyboard, made in Taiwan. The Koreans seem to have already reviewed it in 2006 This is the seller's auction photo:
All photos except this one were taken by me after I received and overhauled the keyboard, so you may notice that the yellowing is gone, etc.
The dimensions are about the same as the Cherry 1800, and probably both were designed with a similar application in mind, 19 inch rackmount equipment. Both the Cherry 1800 and this Costar CSK-1101P have all the keys of a full 101-key board. But Costar had a different idea of how to fit them within the 19 inch footprint.
Note the two rows of downsized function keys at the top.
I think some old laptops used similar keycaps; for example:
Being a prominent feature of this keyboard, I think they deserve a closeup:
The downsized keys are in two clusters of two rows each. One cluster contains F1-F12 (and Esc sits there by its side), the other has the navigation keys (Insert, Home, ...) plus Pause and PrtSc. Curiously, the all-important Scroll Lock got a full size keycap next to NumLock (see the first picture.)
The full size keys are the usual vintage white-and-grey, but the small keys are all grey.
The 1 unit Backspace and BIGass Enter are typical for Taiwan-made keyboards of the era.
Key profile:
This is the standard ABCDE profile. Obviously, there is no F.
Back side of the keyboard:
Closeup of the label:
Costar Electronics, Inc.
Model: CSK-1101P
S/N: № 89006191
Date:
FCC ID: GS23TYCSK-1101P
Wow, even a serial number! Everything just like the big boys!
The sticker that has been placed over the label reads: "Sigma System Computer Ag. Serial No: 501011. Warranty void if removed." Actually there is no screw or anything under this sticker.
Sigma may have been an integrated solutions builder who ordered these keyboards from Costar. Google, however, does not readily find this Sigma.
To open up the keyboard, you unscrew the 3 screws, then carefully pop 5 latches.
Worth noting are the collapsible feet, AT/XT switch, and the cable which can be routed out of the case through the left or right hole, whichever is more convenient. The coiled cable ends with a DIN-5 connector.
Another feature that I think is interesting is how the upper half of the case is larger than the lower half, and overhangs it near the front edge, forming a kind of a built-in hand rest:
Actually I am taking these pictures when I am finished with my work on this keyboard and in the process of putting it back together, but please allow me to post the pictures here in reverse order and pretend I am disassembling it.
Continued in the next post due to the limit of 10 attachments per post...
Last edited by mbodrov on 14 May 2013, 22:59, edited 1 time in total.
- mbodrov
- Location: Moskva, Russia
- Main keyboard: Cherry G80-1853
- Main mouse: Logitech G5
- Favorite switch: MX ErgoClear
- DT Pro Member: -
The case opened, revealing the PCB:
It is tricky to take flash photos of shiny surfaces, and I am not good at it. This attempt probably comes the closest to life color:
PCB detail. One of the wires in the cable is a grounding/shield wire, and it is screwed to the metal plate (discussed below)
Some of the switch locations are labeled, with their names etched in PCB copper. No room for flexible layout changes here (contrast with the Cherry G81 membrane). Not all of them are labeled, though. I guess they did it where there was empty space on the PCB. Product name inscribed with the same method: "CSK-1101P VER 1.7 COSTAR"
The PCB assembly taken out of the case:
The cable connects to the PCB with a 4-pin connector, and can be easily detached.
A closeup of the connector, and, coincidentally, the keycaps go off for the first time:
As mentioned before, the switches are plate-mounted. The plate is a sheet of metal about 1 mm thick, painted with black paint. Heavy, so likely steel, not aluminium.
The plate and AT/XT switch:
The controller:
The chip is labeled "CSK-001, Intel 1980"
which probably means "Costar Keyboard, version 001"
A custom order by Costar from Intel?
continued...
Last edited by mbodrov on 14 May 2013, 23:02, edited 1 time in total.
- mbodrov
- Location: Moskva, Russia
- Main keyboard: Cherry G80-1853
- Main mouse: Logitech G5
- Favorite switch: MX ErgoClear
- DT Pro Member: -
What everybody has been waiting for: switches!
These are Omron switches, the most common orange type. A white switch for the spacebar, and some green switches in the upper clusters - to be discussed below.
Switch shells labeled: OMRON B3G-S
on the orange and white switches. Greens are unlabeled
On closer inspection, I find something really unpleasant:
Dings and dents in the plate down to the bare metal, and a busted switch! All likely evidence of a previous owner's inept attempts to remove the keycaps and wash that ugly yellowing off of them - and completely doomed to failure without Retrobright too, of course.
Though I said "on closer inspection", in fact it was not so subtle when I started pulling off the keycaps and was greeted with springs and small parts flying out in my face!
Oh well, at least we get a chance to look at the internal components of the Omron switch. Otherwise this switch has a reputation as "designed to resist any attempts at opening."
Hopefully the next photo does an acceptable job of showing the latch that has snapped off. The 'lid' of every switch has a pair of these latches, on the opposite sides, and here one of them has snapped off, and remains stuck, locked to the lower half of the switch shell. Caused in all likelihood by pulling on the keycap with too much force and in the wrong direction, finally ripping the slider out, and ripping the switch open.
Also visible inside the shell is the switchplate assembly (a.k.a the stationary contact), still holding there because its legs are the legs of the switch, soldered onto the PCB.
Remember kids, always use a proper keypuller, with Alps in particular, lest you gut your switches!
Starting to put the parts back together. Needless to say, it helps greatly if you do not lose them to begin with (well-lit workplace, preference for the color white, and so on.)
The switch works OK like that, there is a small problem though. Having lost one of its two latches, the lid does not want to stay firmly closed. Because of the spring trying to push the slider out, there is a narrow gap between the lid and the lower half of the shell.
I was planning to fix this with four tiny drops of glue, one in each corner. That would hold the lid closed, and the switch still would be openable with an x-acto blade, should I ever need to in the future.
It failed, though; while PVC glue works on the lid (and I was able to partially reconstruct the latch thanks to that), the lower shell was impervious to every plastic solvent I tried. Maybe it is made out of PP (polypropylene), which I do not have the glue for, and even if I did, I think it is not supposed to work very well: PP is one of the most troublesome plastics to glue. At least this is good news for the switch itself, I guess: the harder it is to glue something, the better for friction (case in point: Teflon), and because the lower shell contains the grooves that the slider moves in, the switch should remain very smooth for very long.
Since glue failed, it is time to fall back to the old mainstay: tape.
Ah, tape, the epitome of efficient repair. Looks very ugly, and works perfectly.
As usual, I have this keyboard connected to my computer for this review, and I am typing this review on it. No problems with the switches.
continued...
Last edited by mbodrov on 14 May 2013, 23:21, edited 1 time in total.
- Elrick
- Location: Swan View, AUSTRALIA
- Main keyboard: Alps - As much as Possible.
- Main mouse: MX518
- Favorite switch: Navy Switch, ALPs, Model-M
- DT Pro Member: -
One of the BEST take downs on any keyboard thus far. Thank you for the perfect pictures which are always welcomed.
Greatest respect to people who find rare pieces and restore them for everyone to see. You've done a nice job on this keyboard plus I can appreciate the way they placed the F keys up top, but the delete key placement is somewhat weird to me.
I suppose being spoiled with it's current placement near the backspace key has become the norm now with every keyboard currently made and distributed.
- Muirium
- µ
- Location: Edinburgh, Scotland
- Main keyboard: HHKB Type-S with Bluetooth by Hasu
- Main mouse: Apple Magic Mouse
- Favorite switch: Gotta Try 'Em All
- DT Pro Member: µ
Brilliantly detailed work! This is the kind of care that every rarity needs paid to it in public. Great reference for anyone else who encounters Omrons.
My only suggestion is to reserve a string of posts before commenters like us can show up and get in the way. Then hit edit on them at your leisure. Back to the good stuff…
- mbodrov
- Location: Moskva, Russia
- Main keyboard: Cherry G80-1853
- Main mouse: Logitech G5
- Favorite switch: MX ErgoClear
- DT Pro Member: -
The slider is also thinner, and does not accept standard Alps mount keycaps.
As there is no logo on the greens, I do not know who manufactured them (Omron or another company).
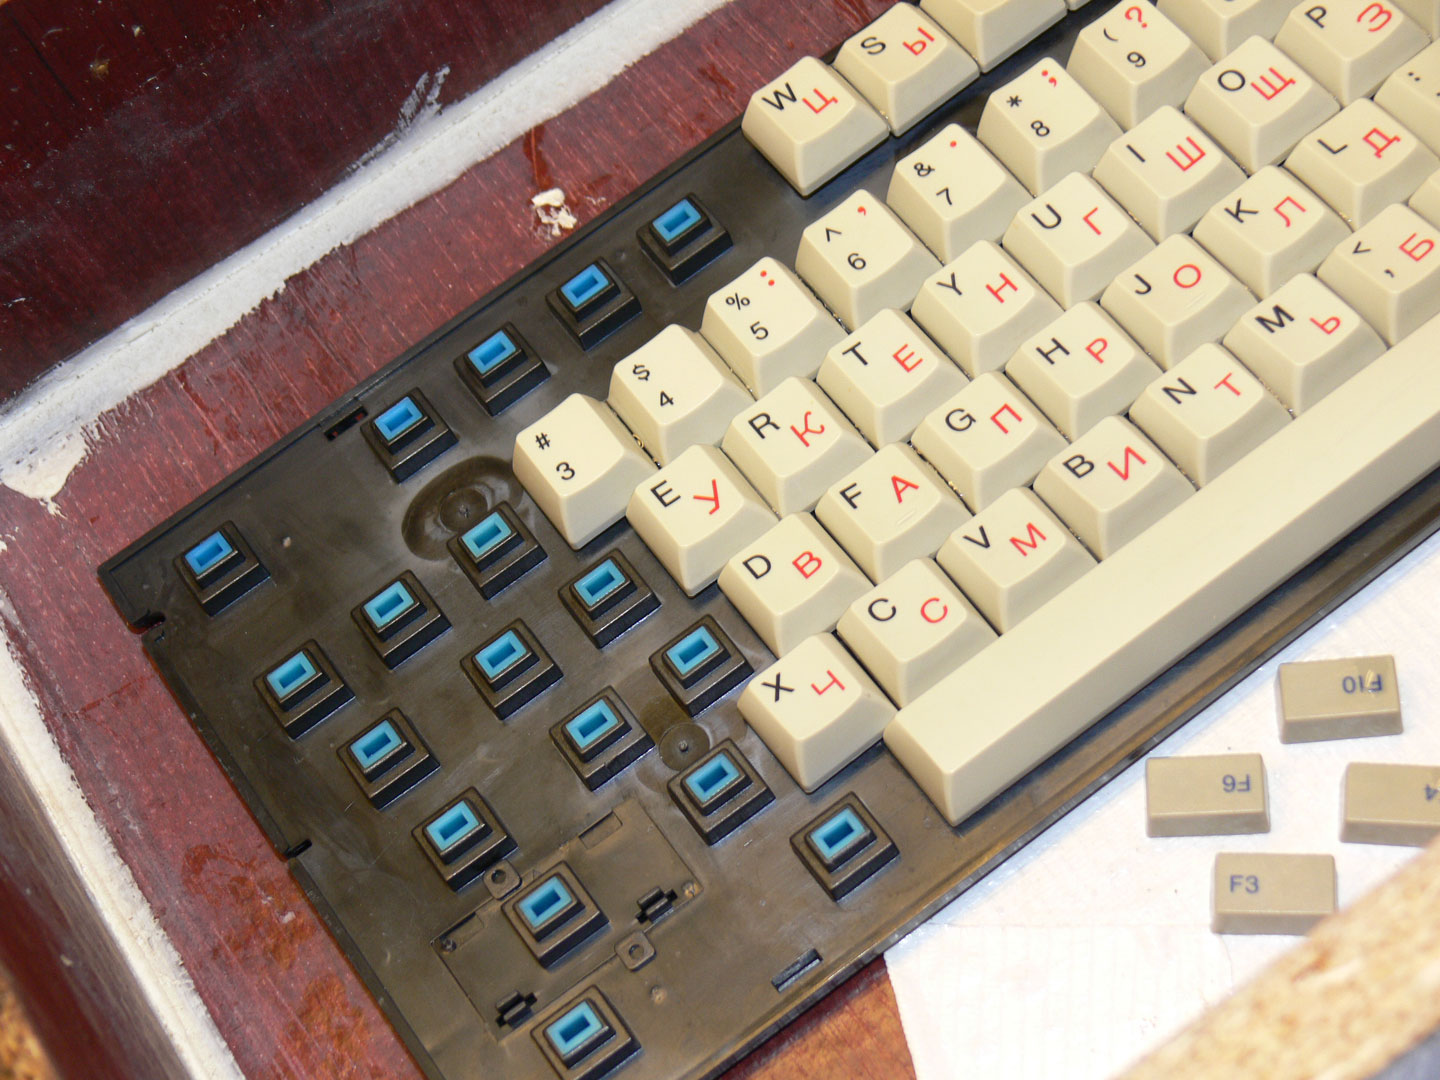
A pretty picture to wrap this up before we move on to the subject of keycaps:
I think keyboards with a variety of slider colors do have their own unique appeal...
So, keycaps. They are also somewhat uncommon: ABS but pad printed. Normally you would find the ABS plastic used specifically for double-shot injection molded keycaps, and I was expecting that at least the English legends would be doubleshot.
Not in this case, though:
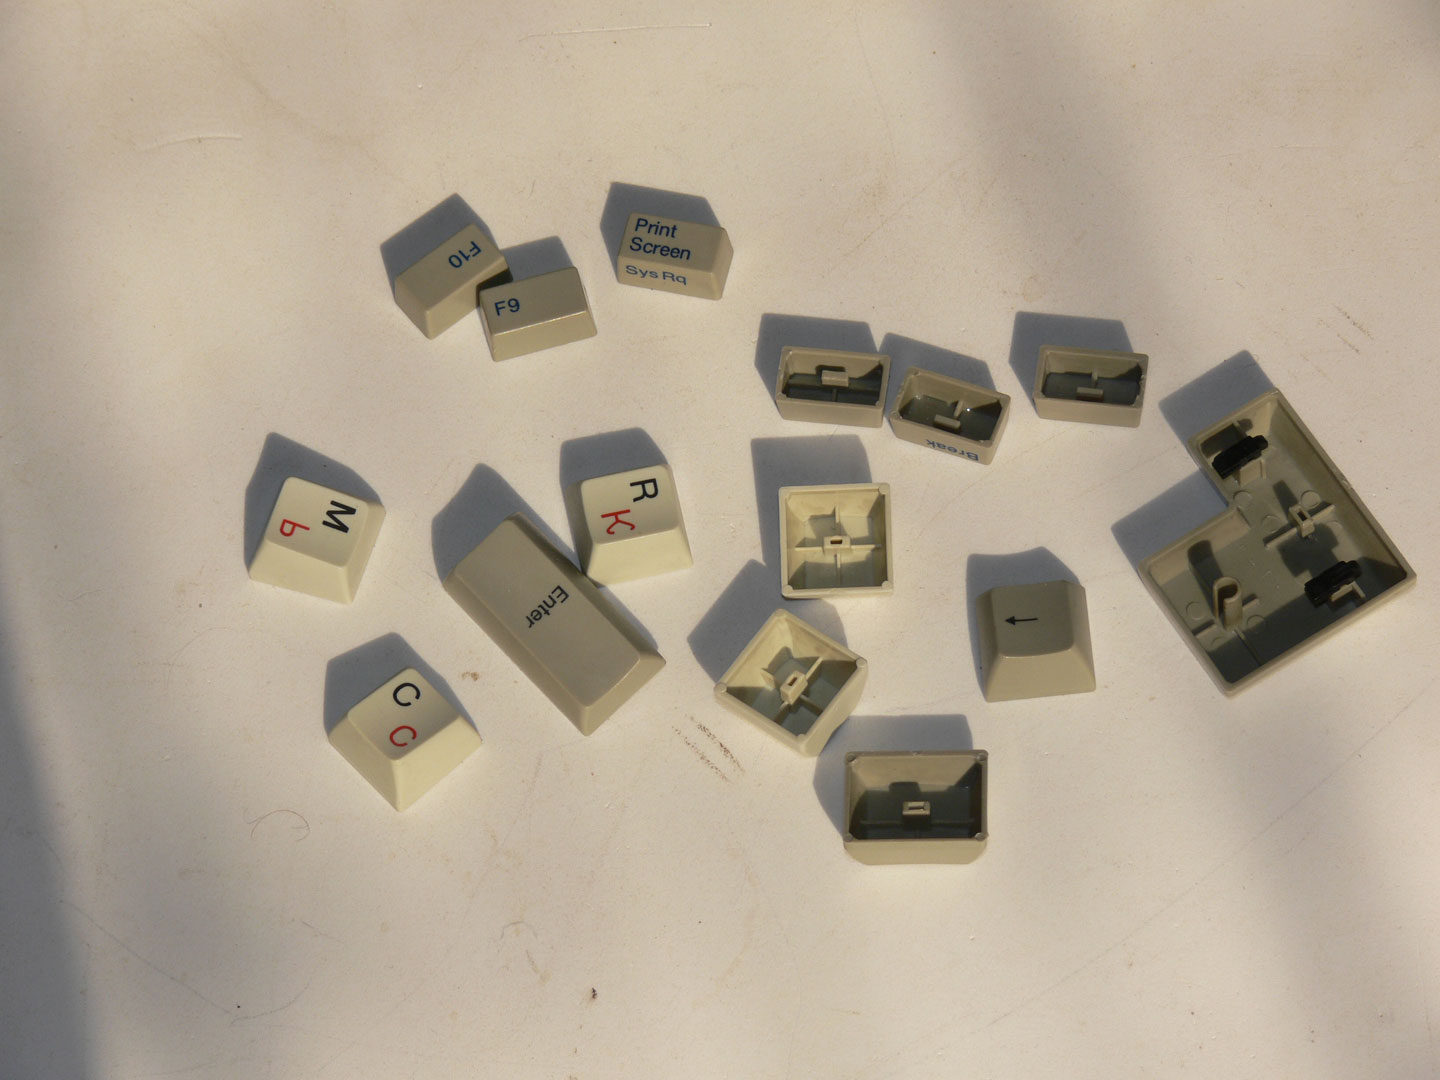
Also note the difference between the standard Alps mount stems on the full-size keycaps, and the incompatible stem on the slim keycaps.
I did not chemically test whether the plastic is indeed ABS, but I am fairly sure based on the telltale signs: yellowing and shine. Both are present (actually, yellowing is visible only in the seller's original photo, the keyboard has been retorbrighted now.)
Shine:
That is the reflection of my window frame in the '7' key. Actually the 7 is just about the only shiny key on the keyboard, having been heavily used in its 'Home' capacity no doubt. Compare to the intact texture on the much less frequently used Num Lock.
The pad printing appears to be more that just a layer of paint. The legends are clearly protruding above the surface: again, take notice how the '7/Home' legend has actually allowed some of the texture to survive around the letters. So, maybe, the legends are in fact a layer of plastic that was heated and pasted onto the keycaps. I think they use a similar process to draw lines on roads. At any rate, this pad printing does not show the slightest sign of starting to wear off, even on a keycap that has lost much of its texture like the '7', and must be much more durable than Cherry Corp's pad printing which is just paint.
Although in good condition in regards to wear, the keycaps I received were noticeably yellowed, so treatment with Retrobright was necessary. Wait, I do have a picture with the yellowed caps!
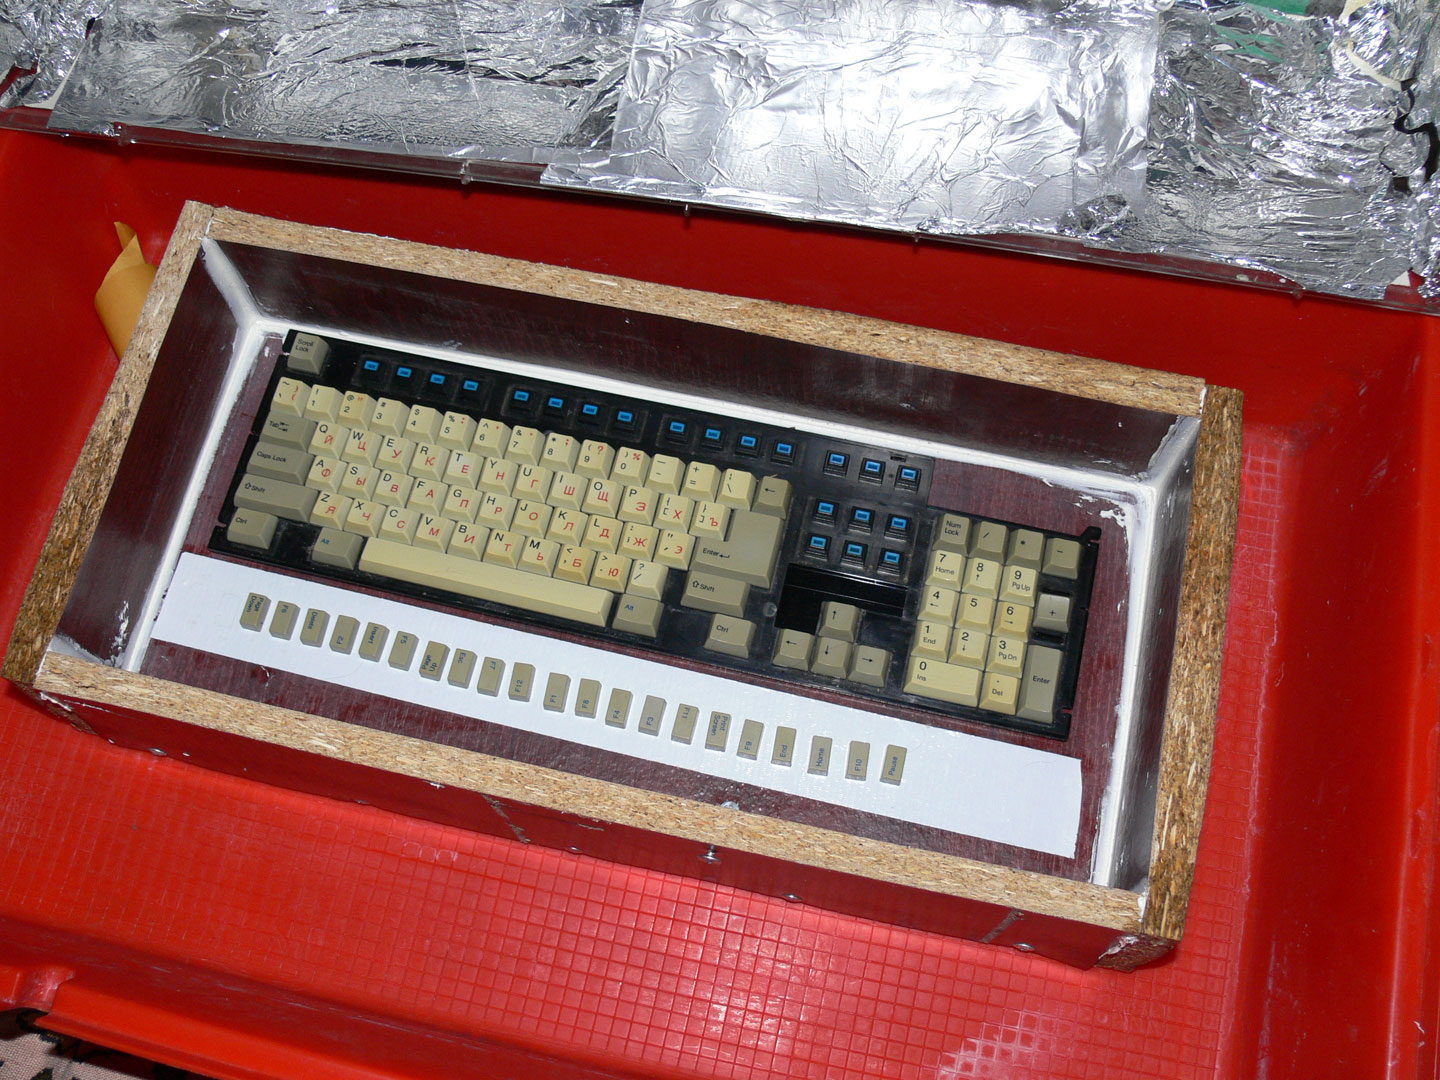
They were not only yellowed, but worse: unevenly yellowed. I am not sure what causes this; possibly a big variation in the quality of plastic from one keycap to another? I have never seen this with Cherry keyboards, but it seems like it is pretty common with Taiwan-made keyboards.
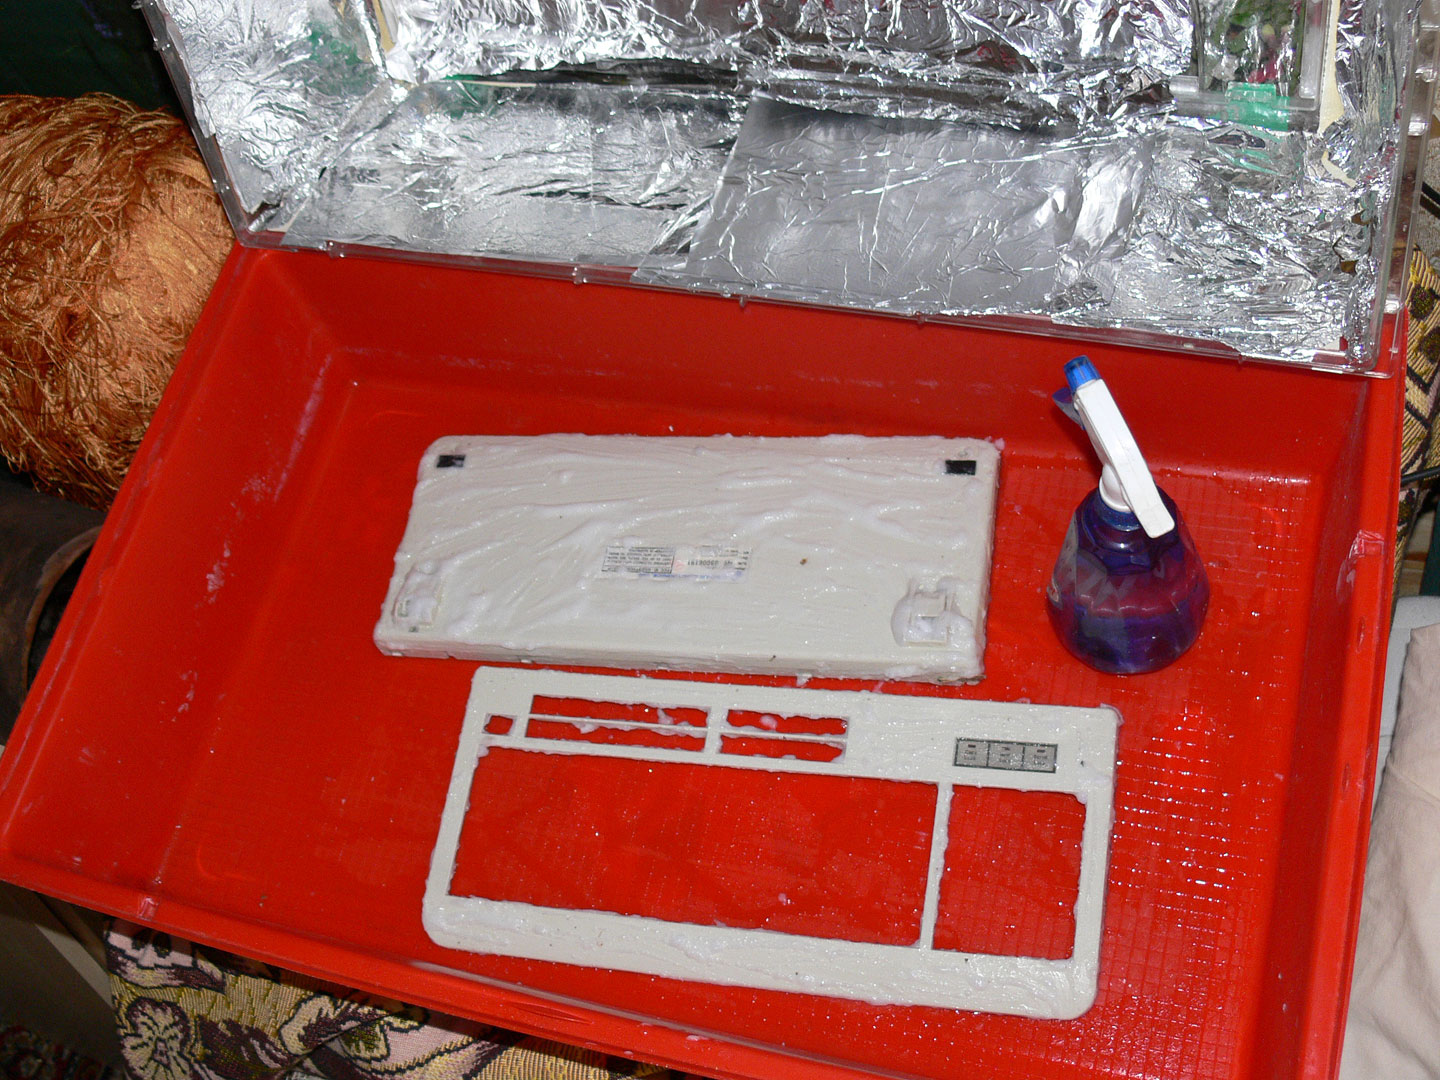
Before retrobrighting, the keycaps are mounted on my Alps holder (formerly a non-mechanical keyboard, with all metal parts pulled out). I am going to use liquid Retrobright, and without the holder, the keycaps would float. I need them to stay below the surface:
The holder was a standard keyboard, and it does not have sliders that would accept the non-standard slim keycaps. I am forced to use double-sided tape to keep them at the bottom. (Not an ideal solution because they are liable to detach from the tape and float up, so I have to check on them periodically)
The sun has decided to come out - a rare occurence in Moskva, Russia:
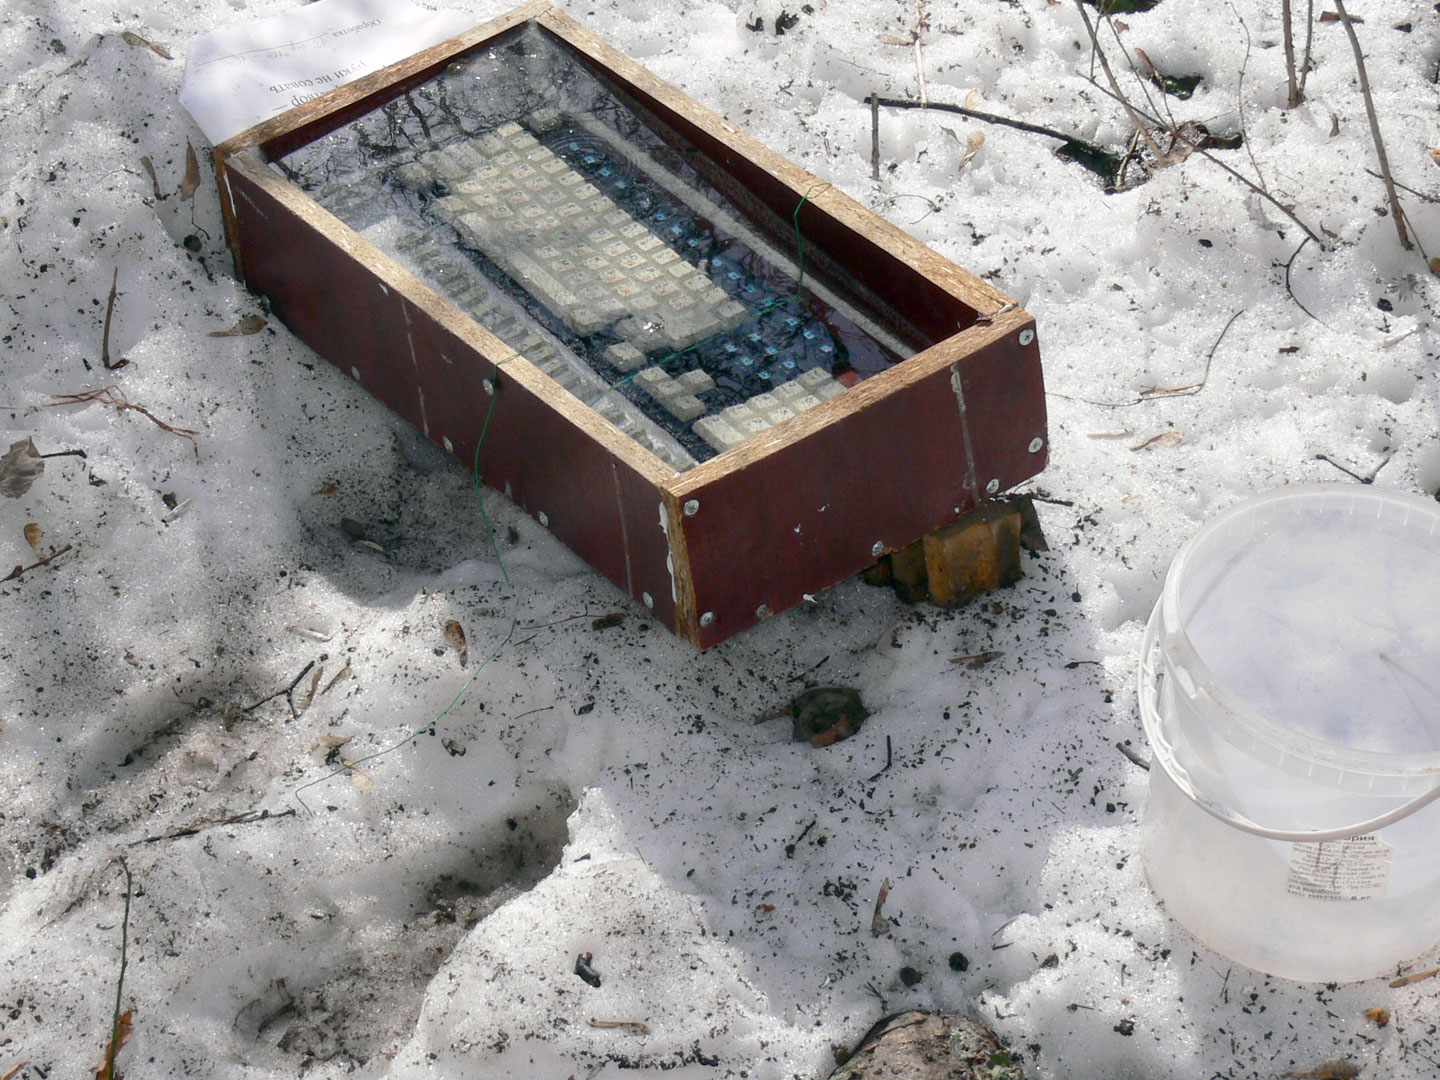
Keycaps soaking in Retrobright under the April Moscow sun.
The case is also treated, this time with Retrobright Gel. The label on the back of the case has been covered with some tape to prevent its destruction by the strong oxidant that Retrobright is:
To judge the degree of success, here is a kind of a before-and-after shot, all in one:
UV light did not reach under the collapsible feet, and these spots have retained their original yellowed condition. I think it is OK to leave them like this.
continued...
Last edited by mbodrov on 14 May 2013, 23:14, edited 1 time in total.
- mbodrov
- Location: Moskva, Russia
- Main keyboard: Cherry G80-1853
- Main mouse: Logitech G5
- Favorite switch: MX ErgoClear
- DT Pro Member: -
Retrobrighting results:
Case: Complete success. Exposure time 1 day, Retrobright gel, sunlight
Caps: Complete success? Exposure time 5 days, Retrobright liquid, sunlight
5 days is a long time to spend retrobrighting something, so something must have been not quite right, right?
Viewed alone, the keycaps look pretty much completely whitened:
(Funny lighting, I know. There was no better available, and I have played with white balance afterwards so that the important part looks like it does in real life.)
However, when the keyboard is fully assembled, (coming back to the picture posted above in this thread) -
the color of keycaps appears ever so slightly different from that of the case. Namely, yellower. To the naked eye it is almost imperceptible, but it can be enhanced through the magic of Photoshop (Ctrl+U > Yellows > Saturation +90):
As you can see, there is not the slightest hint of yellow in the case, and quite a bit of it in the keycaps. After spending 5 days on very thorough treatment in my attempts to get rid of this yellow (again, almost invisible to the eye), I am in inclined to think it is not the "ABS yellowing", but rather there by design. Or, more likely, a failure by the manufacturer to color match the plastics used in the production of the case and the keycaps, probably manufactured at different times with different machines, possibly by different companies.
Also supporting this conclusion is the fact that all uneven yellowing is gone, all the keycaps are very precisely the same color now. Additionally, all parts of a keycap are uniformly the same color; ABS yellowing is typically the worst near the top of the keycap, where it receives more exposure to the sun:
This was also observed on these Costar keycaps before the treatment, but is now completely cured.
So, I must conclude that all the ABS yellowing has been eliminated with Retrobright, and whatever remaining yellow tint was there in the beginning.
With this issue out of the way, it was time to put everything back together. Putting the keycaps on is trivial; final testing revealed one last small problem. The Enter key felt rather scratchy, which I linked to the long stabilizer 'pipe' on the BIGass Enter. Adding a tiny drop of lubricant:
MUCH better !
Speaking of stabilizers, they are the usual simple wires, but there is a lot of them.
Example on the numpad, 2-unit length:
Spacebar, also showing the white switch:
I do not know how in what way the white switch is different from the orange.
Counting all stabilized keys, there is: BIGass Enter, numpad Enter, Spacebar, Caps Lock, left Shift, and short right Shift. This is more than you can expect in the average Taiwanese keyboard; some of them go as far as to stabilize the long left Shift and be done with it. Definitely it is rare to see stabilizers on Caps Lock and the short right Shift, even Cherry does not provide them in the 1800.
This concludes this review for now; maybe I will add another post if I remember something I was intending to write about but did not.
Last edited by mbodrov on 14 May 2013, 23:18, edited 1 time in total.
-
- Location: Norway
- Favorite switch: Hall Effect
- DT Pro Member: -
I saw this topic around 10 minutes after the first post was posted, but I decided to not post since more was coming. Sad that you others diden't do that, since it kinda ruins the "continuity" of the thread.
Anyways, here's what I wanted to post; That's a beautiful board, I love cyrillic keycaps and that's a really nice layout. If you ever decide to sell it, hit me up!
As for your work; great and professional work, this is a top-notch disassembly.
Anyways, here's what I wanted to post; That's a beautiful board, I love cyrillic keycaps and that's a really nice layout. If you ever decide to sell it, hit me up!
As for your work; great and professional work, this is a top-notch disassembly.
- Daniel
- Location: Blackforest Germany
- Main keyboard: Various
- Main mouse: Kensington Slimblade + MX518
- Favorite switch: Cherry MX Blue and Black + BS
- DT Pro Member: 0028
Nice keyboard with an interesting layout. But the / at the right end side would just make this unusable for me. I really like the rounded case 

- graboy
- Main keyboard: Filco Tenkeless w/blues
- Main mouse: Logitech G9x
- Favorite switch: Cherry MX Blue
- DT Pro Member: -
I have to second this, excellent job. The keyboard looks amazing. The best way to confirm keycap materials is that ABS floats on water, PBT and POM sink, I think Mr. Interface has a youtube video on it.Okeg wrote:As for your work; great and professional work, this is a top-notch disassembly.
- Daniel Beardsmore
- Location: Hertfordshire, England
- Main keyboard: Filco Majestouch 1 (home)/Poker II backlit (work)
- Main mouse: MS IMO 1.1
- Favorite switch: Probably not whatever I wrote here
- DT Pro Member: -
- Contact:
The greens are, for a lack of a better term, [wiki]Alps CM compact[/wiki].
I didn't pay any attention to the numbering on Omron switches, but now I can see that all orange ones say "B3G-S", as do the white and cyan ones.
- Daniel Beardsmore
- Location: Hertfordshire, England
- Main keyboard: Filco Majestouch 1 (home)/Poker II backlit (work)
- Main mouse: MS IMO 1.1
- Favorite switch: Probably not whatever I wrote here
- DT Pro Member: -
- Contact:
- elecplus
- Location: Kerrville, TX, USA
- DT Pro Member: 0082
- Contact:
I have a similar one, but with different switches, and no Cryllic on the caps.
- Attachments
-
- IMG_7126.JPG (225.23 KiB) Viewed 10212 times
-
- IMG_7127.JPG (137.32 KiB) Viewed 10212 times
-
- IMG_7121.JPG (522.5 KiB) Viewed 10212 times
-
- IMG_7122.JPG (182.51 KiB) Viewed 10212 times
-
- IMG_7125.JPG (150.5 KiB) Viewed 10212 times
-
- IMG_7121.JPG (522.5 KiB) Viewed 10212 times