Toaster SMD re-flow oven
-
- Location: Stockhom, Sweden
- Main keyboard: Symmetric Stagger Board
- Main mouse: Kinzu
- Favorite switch: Topre
- DT Pro Member: -
I came to a point where I really needed to look into re-flow soldering. So I found this guide modifying a toaster into an oven. Seemed simple enough, so I went down to the second hand store and bought myself a $7 PHILIPS Toastissimo™.
Removed all the electrical and popping-up-stuff. Had to scavenge the trash just for the photo. I know there used to be more stuff in there, like springs and crumbs.. Added a power control and a temperature probe, both from ebay. $9 for the relay (+$9 shipping I didn't notice at first) A bit expensive but I expect to be able to use it for other purposes. £0.99 for the probe (free shipping). It seems very slow, and I have no idea how accurate it is. The relay uses phase cutting to modulate the power output to the heating elements. Here is a video of the output seen with an oscilloscope. I measured the other side of the load so it's a bit backwards, but the idea should come through.
By the way, don't try this at home. No electrical safety included...
Last edited by bpiphany on 22 Nov 2013, 10:53, edited 5 times in total.
-
- Location: Stockhom, Sweden
- Main keyboard: Symmetric Stagger Board
- Main mouse: Kinzu
- Favorite switch: Topre
- DT Pro Member: -
Action shots of building a replacement controller.
Applying solder paste Placing components Re-flowing Reflown controller Close ups
Last edited by bpiphany on 22 Nov 2013, 11:02, edited 3 times in total.
- Halvar
- Location: Baden, DE
- Main keyboard: IBM Model M SSK / Filco MT 2
- Favorite switch: Beam & buckling spring, Monterey, MX Brown
- DT Pro Member: 0051
Wow, so it really is a toaster ...
I only knew the pizza pan method so far:
http://www.heise.de/hardware-hacks/arti ... 76166.html (German, I don't know if they have an English version, sorry)

I only knew the pizza pan method so far:
http://www.heise.de/hardware-hacks/arti ... 76166.html (German, I don't know if they have an English version, sorry)
-
- Location: Stockhom, Sweden
- Main keyboard: Symmetric Stagger Board
- Main mouse: Kinzu
- Favorite switch: Topre
- DT Pro Member: -
Certainly a step towards pre-assembled controllers. It's still a bit of work, and I'm not sure about the quality I can achieve. The first Hoof I toasted got a distinctive yellow tan... The second one was better off =) They both seem to work fine though. It's for sure a good step verifying the footprints work for re-flowing.
[added some pictures and videos to the second post]
[added some pictures and videos to the second post]
- hasu
- Location: Japan
- Main keyboard: HHKB
- Main mouse: HHKB
- Favorite switch: Topre
- DT Pro Member: -
Nice. Thanks for sharing this.
I've been thinking of diy reflow oven for a while but not start on anything yet. I didn't know pop-up toaster can be converted into reflow machine, every articles I found used toaster oven(with door) instead.
- Daemon Raccoon
- Location: Flyover Country, United States
- Main keyboard: Model M SSK 1391472
- Main mouse: CST2545W-RC LTrac
- Favorite switch: Buckling Spring
- DT Pro Member: -
Toaster ovens and hot plates are more common for reflow hacks. This is awesome (and cheaper).
-
- Location: Stockhom, Sweden
- Main keyboard: Symmetric Stagger Board
- Main mouse: Kinzu
- Favorite switch: Topre
- DT Pro Member: -
I didn't, I mentioned it in the vimeo comment and I probably should have put it here as well. The stencil was made by http://smtstencil.co.uk Fast and cheap. Steel is better (I've heard) but a lot more expensive.Daniel wrote:This is really interesting. How did you make the stencil for the solder paste?
- hasu
- Location: Japan
- Main keyboard: HHKB
- Main mouse: HHKB
- Favorite switch: Topre
- DT Pro Member: -
OSH, seedstudio and elecrow also have stencil service. I've never used any of these though.
http://www.oshstencils.com/
http://www.seeedstudio.com/service/inde ... st/stencil
http://www.elecrow.com/services-c-73/pc ... p-450.html
http://www.oshstencils.com/
http://www.seeedstudio.com/service/inde ... st/stencil
http://www.elecrow.com/services-c-73/pc ... p-450.html
- bearcat
- Main keyboard: Kinesis Freestyle
- Main mouse: none
- Favorite switch: cherry
- DT Pro Member: -
A crazy friend did this with a hotplate once... what're the pros/cons of doing it with a toaster heating element instead?
same crazy friend also insists i can do my smt boards by hand -- but i'm looking at the hotplate idea and would love to know about alternatives!
-
- Location: Stockhom, Sweden
- Main keyboard: Symmetric Stagger Board
- Main mouse: Kinzu
- Favorite switch: Topre
- DT Pro Member: -
Soldering 0603s and 0.8mm pitch stuff by hand isn't too hard. You need a decent iron, flux and some practice. 0402s is still possible, my biggest problem with them is to not add too much solder.. They certainly are easier to re-flow. No-lead packages with internal pads are quite tricky to solder with an iron. It can be done with some witchcraftery, but I wouldn't recommend it =)
I think that if you are using a hot plate it is easy to heat the circuit board up more than what is recommended. Most of the heat will be coming through the board from below. GND connections will probably heat up pretty quick if there are ground planes. Some other nets may take a long time for the heat to reach, and different parts will reach different temperatures in the same amount of time. My guess is that an oven will heat stuff up more evenly, and the board won't heat up as much. That is all my speculations.
I moved all the videos to youtube. Both for embedding and unlimited(?) HD uploads. It's nice how the components just floats into place when the solder paste melts =D
- matt3o
- -[°_°]-
- Location: Italy
- Main keyboard: WhiteFox
- Main mouse: Anywhere MX
- Favorite switch: Anything, really
- DT Pro Member: 0030
- Contact:
gosh... I feel so noob...
- Vierax
- Location: France (Lille)
- Main keyboard: Tipro MID KM128 Bépo layout
- Main mouse: Kensington Orbit Trackball
- Favorite switch: MX Clear / MX Grey (under thumbs)
- DT Pro Member: -
- Contact:
excellent !!
- esoomenona
- Location: TX, USA
- DT Pro Member: -
This is why I love bpiphany. Not the first time I've seen the controllers, but first time I've seen this thread, and it's amazing. Thanks for posting this, and for creating such amazing controllers. The keyboard community is a better place because of people like you and hasu and xwhatsit and so many countless others. My appreciation is tremendous, and even if never use your products personally, I applaud you.
-
- Location: Stockhom, Sweden
- Main keyboard: Symmetric Stagger Board
- Main mouse: Kinzu
- Favorite switch: Topre
- DT Pro Member: -
Did some upgrades to the toaster yesterday. Added more insulation and tidied up the wiring a bit. Built the solid state relay into a unit with its potentiometer and added a wall outlet for modular regulated power =)
I also, once again, tried moving into the realm of 0402 and QFN components. I've not been getting along to great with them in the past. This time I had some better results. The 0402s I think I have under control, QFNs still require some touching up. It's hard to get little enough solder paste. The range between too much and nothing seems very short =P I often end up removing some with a wick, and that can be hard if space is tight. An 0402 easily comes off along with the wick..
Anyway, pictures of the good results!
Oh my,.. Thank you Mr. Moose =)
-
- Location: Stockhom, Sweden
- Main keyboard: Symmetric Stagger Board
- Main mouse: Kinzu
- Favorite switch: Topre
- DT Pro Member: -
I'm a bit reluctant to out it in case people want it.. Because then I'll would have to build them, and there still is a lot of hands on touching up involved in my QFN soldering process.
It has a 32u2 controller, 7 buttons and a silly-strong RGB LED.
This particular one I made before I got the paste stencil. So it's a combo of hand soldering and re-flowing when things were impossible to get stuck. Flip side
It has a 32u2 controller, 7 buttons and a silly-strong RGB LED.
This particular one I made before I got the paste stencil. So it's a combo of hand soldering and re-flowing when things were impossible to get stuck. Flip side
-
- Location: UK
- Main keyboard: Filco ZERO green alps, Model F 122 Terminal
- Main mouse: Ducky Secret / Roller Mouse Pro 1
- Favorite switch: MX Mount Topre / Model F Buckling
- DT Pro Member: 0167
looking good,
it is possible to hand solder a QFN but its not easy , just leave the solder mask off on the back side of the board where you have the block of via stitching then you can put a blob of solder on it and also on the pins and then heat it up from the back .
https://www.youtube.com/watch?v=d-f-SBC ... freload=10
not my video i only wish i was that good
-
- Location: Stockhom, Sweden
- Main keyboard: Symmetric Stagger Board
- Main mouse: Kinzu
- Favorite switch: Topre
- DT Pro Member: -
That QFN was soldered that way. You can see the traces has had the solder mask scraped off and become tinned where I have been poking my iron around... I made very small openings in the solder mask, a bit too small, but I was able to get enough heat in there to attach the thermal pad, finally. The trickiest component on this board was the crystal. I just couldn't solder it with my iron. So I pre-tinned the pads and ran everything through the toaster. Almost everything else was already in place by then =P Paste and re-flow is the shizzle. I also tried pre-tinning/filling the thermal vias with solder before applying paste. I think I had too little paste on the thermal pad relative to the other pads otherwise. I still think I need to alter the stencil to deposit even less paste to the small pads.
-
- Location: Stockhom, Sweden
- Main keyboard: Symmetric Stagger Board
- Main mouse: Kinzu
- Favorite switch: Topre
- DT Pro Member: -
Toaster updates \o/
I found these really cheap toaster, $10 (including our crazy sales tax). I knew I just had to have some use for them...
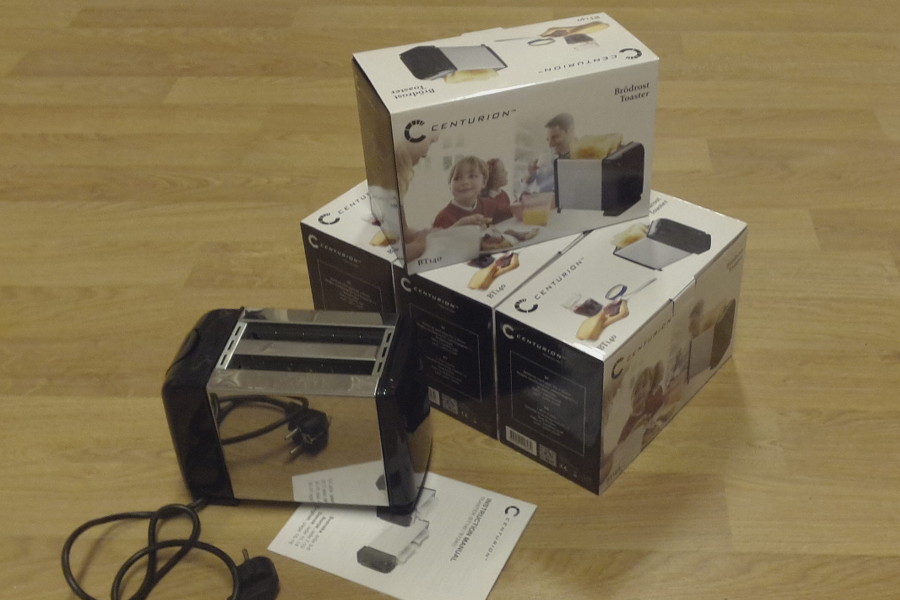
 Somehow I feel I'm not quite trusted. I almost didn't break any of the usage directions in the manual. For toasting buns or very think toast. I will have to install a separate grate to hold the circuit boards, buns, I meant buns.., but I think it will be good to move the heating elements a bit further away from the boards. More convection heat, less radiation heat.
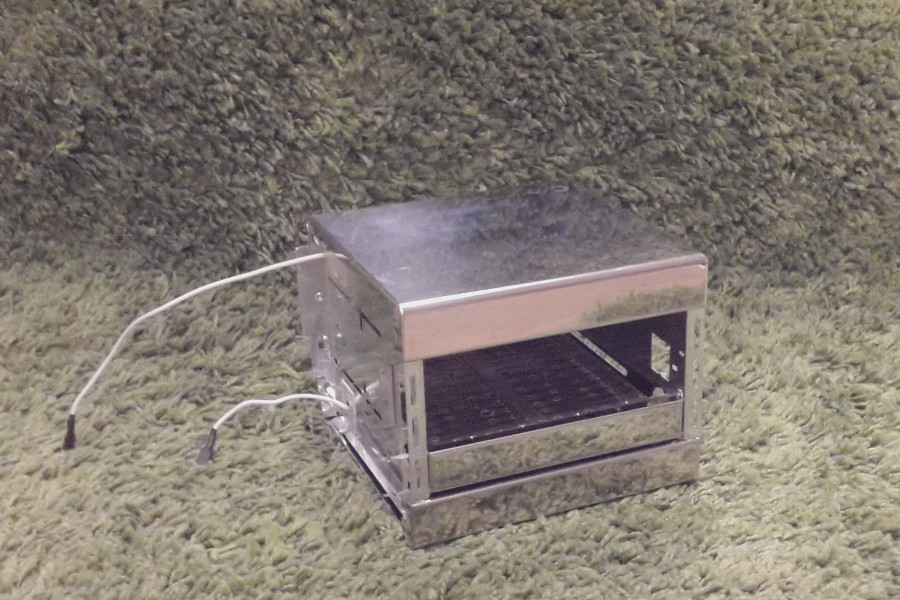
 The toasters also serialize naturally. I've toasted a couple of pills already. They came out fine, but the heating seems to have been a bit uneven. The board only barely fits inside and the ends don't get much heat, but there are also no components close to the edges, so that works out. I believe some isolation will help smooth the temperature out, so I'll add that before next toasting session.
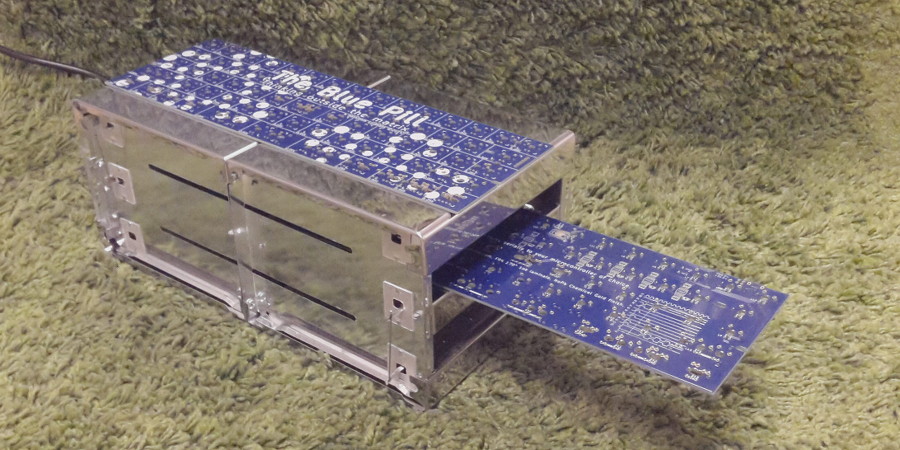
 If I would ever want to fit a full size board I'm going to have to serialize some more...
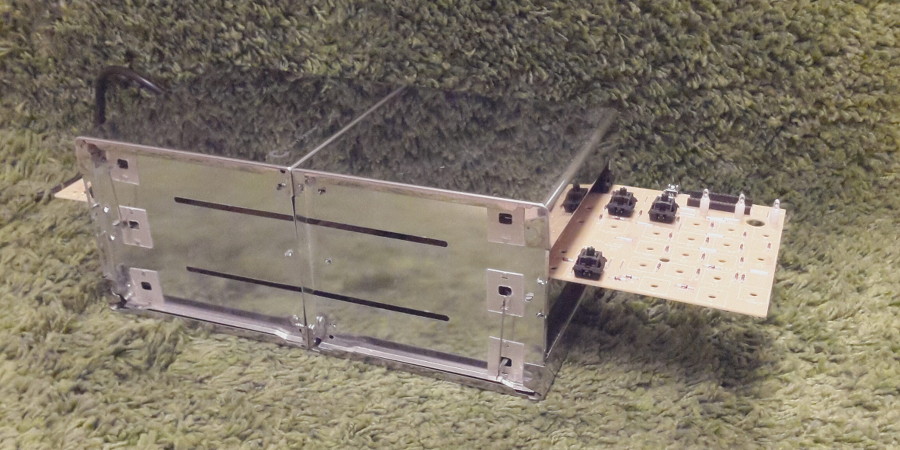
-
- Location: Stockhom, Sweden
- Main keyboard: Symmetric Stagger Board
- Main mouse: Kinzu
- Favorite switch: Topre
- DT Pro Member: -
So, I got myself one of these thermocouple-to-digital converters from Adafruit. After some tinkering (and learning more avr stuff) I got my data logging going. I prepared a batch of new Frosty Flakes and toasted them with the same settings I've come up with through trial and error before. One minute at half power, and just above the "notch" until the solder melts at all solder joints, then I pull them out of the oven to cool off.
Here is the setup, the thermocouple is hiding out under the chip on the middle PCB. I made two separate measurements which came out like this. Red line for temperature vs time, green line is the change in temperature per second, times ten to make it fit the scale. The derivative plot has been smoothed in gnuplot with bezier curves. Perhaps not perfect, but not too bad either. I calibrated the thermocouple according to my Fluke, and they only diffed by a degree or two.
gnuplot command
Code: Select all
set term svg;
set title 'Toastissimo re-flow profile sample #1';
set xrange [0:180];
set xlabel 'Time';
set yrange [-50:300];
set ylabel 'Temperature';
set grid;
plot 'datafile' using 1:2 pt 7 ps 0.1 ti "C°" with line,
'' using 1:3 pt 7 ps 0.1 ti '10·C°/s' smooth bezier;
-
- Location: Stockhom, Sweden
- Main keyboard: Symmetric Stagger Board
- Main mouse: Kinzu
- Favorite switch: Topre
- DT Pro Member: -
Didn't someone post about that already?.. I'm sure I saw it before, but it may have been somewhere else. Kinda sums up the community in a concise way =)
Since we've dug it out I'll post a video too! Dip soldering is reluctantly becoming a thing at Bathroom Epiphanies =D
- vvp
- Main keyboard: Katy/K84CS
- Main mouse: symetric 5-buttons + wheel
- Favorite switch: Cherry MX
- DT Pro Member: -
rammes: I do not believe there is single mass produced toaster which can work as an input device. And especially with USB A-type connector at the device side where there should be B-type or C-type connector. That youtube cheater does not even know which type of USB connector to use. Not even mentioning why the hell would a manufacturer add USB port when some version of serial interface is cheaper. And a simple bimetal is cheaper than a controller.
bpiphany: Interesting alternative to wave soldering. I'll stay with hot air though
