Ok. I will try to drill it then.matt3o wrote:If the layer you need to drill is aluminum, despair not! You can drill it like butter. So I wouldn't consider that a big mistake at all!
Keep us posted with the progress of you great project.
PS: remember to insulate the base!
[COMPLETED] Laser Cut Prototyping mini-GB
-
mtl
- Location: USA
- Main keyboard: Custom
- Main mouse: IBM TrackPoint IV
- Favorite switch: Cherry MX Clicky
- DT Pro Member: -
-
Muirium

- µ
- Location: Edinburgh, Scotland
- Main keyboard: HHKB Type-S with Bluetooth by Hasu
- Main mouse: Apple Magic Mouse
- Favorite switch: Gotta Try 'Em All
- DT Pro Member: µ
Good idea and a good looking project MTL. I have access to a pillar drill that could do the job you need in a few seconds, but I'm up here in Scotland…
Modding those switches will be particularly interesting. Pics when you do!
Modding those switches will be particularly interesting. Pics when you do!
-
Zifle
- Location: Denmark
- Main keyboard: Filco MJ2 Browns
- Main mouse: Razer Mamba
- Favorite switch: MX Browns
- DT Pro Member: -
I have some pictures up here: http://imgur.com/a/8J3Ej
I got the base threaded, and everything fits together nicely! Now it's just a matter of putting it together ...
I got the base threaded, and everything fits together nicely! Now it's just a matter of putting it together ...
-
Muirium
- µ
- Location: Edinburgh, Scotland
- Main keyboard: HHKB Type-S with Bluetooth by Hasu
- Main mouse: Apple Magic Mouse
- Favorite switch: Gotta Try 'Em All
- DT Pro Member: µ
Nice photography!

Some caps on top of that, and I reckon it's site banner worthy. Our custom boards are due a spot up there in fact.
Now to clean up all this mess and get to work on mine!
Some caps on top of that, and I reckon it's site banner worthy. Our custom boards are due a spot up there in fact.
Now to clean up all this mess and get to work on mine!
-
matt3o

- -[°_°]-
- Location: Italy
- Main keyboard: WhiteFox
- Main mouse: Anywhere MX
- Favorite switch: Anything, really
- DT Pro Member: 0030
- Contact:
really a great job Zifle! I didn't think it was possible to thread and line up all holes. Congrats!Zifle wrote:I have some pictures up here: http://imgur.com/a/8J3Ej
I got the base threaded, and everything fits together nicely! Now it's just a matter of putting it together ...
It came up incredibly well.
-
mtl
- Location: USA
- Main keyboard: Custom
- Main mouse: IBM TrackPoint IV
- Favorite switch: Cherry MX Clicky
- DT Pro Member: -
Some updates.. I cleaned the grey goop off the top aluminum plate. It all came off but I managed to add some scratches to the surface in the process. What the hell.. it gives the keyboard more character. 
Cutting the switches around the trackpoint took some time and care but thankfully it all fit together in the end. The B key needs the trackpoint for support now. I think it will hold up.
Here's a picture of the top with the switches in place. I should probably explain the color scheme in a separate post because there's some craziness going on there. All switches were stickered and lubed. This will be my first kbd with stickers, so I haven't a clue if they make any sort of difference.
Here's the view from below. After I get some more screws in the mail I will begin wiring up the matrix.  Here are the 3 lock keys. There will be 3 in-key LEDs and 3 not-in-key LEDs which will show through the holes in the top plate. I hope to make it configurable as to which LEDs light up, depending on if I have key caps with windows on (e.g., the commando set when that arrives
  )
The LEDs are 2x5x5 mm RGB. They fit in the switches with a little dremeling and a little bending of the legs:
)
The LEDs are 2x5x5 mm RGB. They fit in the switches with a little dremeling and a little bending of the legs:
Cutting the switches around the trackpoint took some time and care but thankfully it all fit together in the end. The B key needs the trackpoint for support now. I think it will hold up.
- cut-switches.jpeg (52.29 KiB) Viewed 7479 times
- top-switches.jpeg (161.81 KiB) Viewed 7479 times
- before-wiring.jpeg (196.64 KiB) Viewed 7479 times
- led-legs.jpeg (136.5 KiB) Viewed 7479 times
- bent-led.jpeg (13.39 KiB) Viewed 7479 times
-
matt3o
- -[°_°]-
- Location: Italy
- Main keyboard: WhiteFox
- Main mouse: Anywhere MX
- Favorite switch: Anything, really
- DT Pro Member: 0030
- Contact:
great progress, mtl!
I'm particularly interested in the RGB LED part, do you have enough pins on the teensy to handle the matrix + all the RGB LEDs? or do you use another controller?
I'm particularly interested in the RGB LED part, do you have enough pins on the teensy to handle the matrix + all the RGB LEDs? or do you use another controller?
-
Muirium
- µ
- Location: Edinburgh, Scotland
- Main keyboard: HHKB Type-S with Bluetooth by Hasu
- Main mouse: Apple Magic Mouse
- Favorite switch: Gotta Try 'Em All
- DT Pro Member: µ
That's a Teensy++ under the space bar, if I'm not mistaken!
A lot more actual hacking and elbow grease going into this one than I dare to try for myself. Those RGB LEDs are indeed a fine addition. What Dremmellng was necessary to fit them in, MTL, along with the pin coercion?
A lot more actual hacking and elbow grease going into this one than I dare to try for myself. Those RGB LEDs are indeed a fine addition. What Dremmellng was necessary to fit them in, MTL, along with the pin coercion?
-
matt3o
- -[°_°]-
- Location: Italy
- Main keyboard: WhiteFox
- Main mouse: Anywhere MX
- Favorite switch: Anything, really
- DT Pro Member: 0030
- Contact:
with 3 contacts per LED it's easy to fall short in pinsMuirium wrote:That's a Teensy++ under the space bar, if I'm not mistaken!
-
mtl
- Location: USA
- Main keyboard: Custom
- Main mouse: IBM TrackPoint IV
- Favorite switch: Cherry MX Clicky
- DT Pro Member: -
Ah, good question! I'm going to try to use one of these. A couple LEDs can be driven by the Teensy but I think 4 of them must be driven via the extra controller (since yes, even the Teensy ++ hasn't enough I/O pins), which is addressable over the i2c bus.

I will take some better pics of the modified MX switches to show the dremeling. BTW, if anyone is interested in trying some of these LEDs, I had to order 100 so there are plenty of extras.
matt3o, what do you call that blue plastic you used on Brown Fox? Is it adhesive? I tried searching for it but don't know what to call it.
-
matt3o
- -[°_°]-
- Location: Italy
- Main keyboard: WhiteFox
- Main mouse: Anywhere MX
- Favorite switch: Anything, really
- DT Pro Member: 0030
- Contact:
I believe it's simple adhesive vinyl film, they sell it in rolls usually, they are often used in home decor too. Before using it I verified that it was not conducting electricity with a multimeter.mtl wrote:matt3o, what do you call that blue plastic you used on Brown Fox? Is it adhesive? I tried searching for it but don't know what to call it.
-
Muirium
- µ
- Location: Edinburgh, Scotland
- Main keyboard: HHKB Type-S with Bluetooth by Hasu
- Main mouse: Apple Magic Mouse
- Favorite switch: Gotta Try 'Em All
- DT Pro Member: µ
Finally got back to my desk again. Let's look inside this custom keyboard construction kit Matt3o sent me…
Carefully packaged. The components are labelled too:
Um, okay.
The first thing I did was pop two of the included bolts through the whole stack to give it a feel. And add my mx greens, and some caps…
I've a few replacements ordered from 7bit (more row 1 caps, including Escape, and more 1.25 mods) and neither shift nor return is perfect in the currently available SA anyway. But it's close enough…
Shiny!
I'd really better get this thing together for real. It's an awesome, heavy, tight little keyboard. Just how I like them!
- image.jpg (465.24 KiB) Viewed 7437 times
- image.jpg (470.06 KiB) Viewed 7437 times
The first thing I did was pop two of the included bolts through the whole stack to give it a feel. And add my mx greens, and some caps…
- image.jpg (387.69 KiB) Viewed 7437 times
- image.jpg (376.13 KiB) Viewed 7437 times
I'd really better get this thing together for real. It's an awesome, heavy, tight little keyboard. Just how I like them!
-
matt3o
- -[°_°]-
- Location: Italy
- Main keyboard: WhiteFox
- Main mouse: Anywhere MX
- Favorite switch: Anything, really
- DT Pro Member: 0030
- Contact:
what a wonderful piece, Muirium! I think that low profile DSA caps will look even better on the Shiny Fox
-
Muirium
- µ
- Location: Edinburgh, Scotland
- Main keyboard: HHKB Type-S with Bluetooth by Hasu
- Main mouse: Apple Magic Mouse
- Favorite switch: Gotta Try 'Em All
- DT Pro Member: µ
Perhaps they will. I'll enjoy trying both once the DSA Dolch set arrives. They will have the advantage of a perfectly sized return and shift.
MX greens feel good with this board. They soften the hard steel beneath. I think I'll try some o-rings too, if you'll order some up along with the stabs.
MX greens feel good with this board. They soften the hard steel beneath. I think I'll try some o-rings too, if you'll order some up along with the stabs.
-
matt3o
- -[°_°]-
- Location: Italy
- Main keyboard: WhiteFox
- Main mouse: Anywhere MX
- Favorite switch: Anything, really
- DT Pro Member: 0030
- Contact:
I'm certainly going to get some.Muirium wrote:I think I'll try some o-rings too, if you'll order some up along with the stabs.
I'd like to test the greens on the steel plate. Hope we will meet when I'll come to Scotland
-
Muirium
- µ
- Location: Edinburgh, Scotland
- Main keyboard: HHKB Type-S with Bluetooth by Hasu
- Main mouse: Apple Magic Mouse
- Favorite switch: Gotta Try 'Em All
- DT Pro Member: µ
Sure thing. I might even have figured out how to make the whole thing RGB LED backlit by then! I know how much you love backlights! (Not.)
-
Zifle
- Location: Denmark
- Main keyboard: Filco MJ2 Browns
- Main mouse: Razer Mamba
- Favorite switch: MX Browns
- DT Pro Member: -
That shiny plate looks awesome oO!
I've added a couple of pictures to my album, I've finished soldering up the board itself (and it works!), and just need to get the usb plug soldered on the end, and it's complete!
http://imgur.com/a/8J3Ej#8jRfmWc
I've added a couple of pictures to my album, I've finished soldering up the board itself (and it works!), and just need to get the usb plug soldered on the end, and it's complete!
http://imgur.com/a/8J3Ej#8jRfmWc
-
mtl
- Location: USA
- Main keyboard: Custom
- Main mouse: IBM TrackPoint IV
- Favorite switch: Cherry MX Clicky
- DT Pro Member: -
Excellent progress, Zifle! How did you thread the bottom layer? That looks like the way to go.
Edit: To reduce the amount of spam I've been posting I have shamelessly copied Zifle and posted pics to imgur. There are some new ones up there. I got the brass inserts in the mail finally and screwed some of the layers together:
Also I've begun wiring the matrix. It is painstaking work and I've been going really slow (one row of diodes per night):
I filed away the red area, which makes for more than enough room. I'll try to get some closer pics of the switch with LED in it.Muirium wrote:What Dremmellng was necessary to fit them in, MTL, along with the pin coercion?
- switch-top.png (176.09 KiB) Viewed 7360 times
- interior-side.jpeg (172.5 KiB) Viewed 7358 times
- bottom-corner.jpeg (226.81 KiB) Viewed 7358 times
- top-rows.jpeg (248.88 KiB) Viewed 7358 times
-
matt3o
- -[°_°]-
- Location: Italy
- Main keyboard: WhiteFox
- Main mouse: Anywhere MX
- Favorite switch: Anything, really
- DT Pro Member: 0030
- Contact:
Zifle, you did are a really great job. Congrats! It looks very professionally done. IMHO you just have to file the laser cutting left over on the sides (there's a little dent on the front I think).Zifle wrote:I've added a couple of pictures to my album, I've finished soldering up the board itself (and it works!), and just need to get the usb plug soldered on the end, and it's complete!
http://imgur.com/a/8J3Ej#8jRfmWc
You guys are goodmtl wrote:Edit: To reduce the amount of spam I've been posting I have shamelessly copied Zifle and posted pics to imgur. There are some new ones up there.
When all boards are done it would be nice to make a showcase/gallery of all of them.
-
Zifle
- Location: Denmark
- Main keyboard: Filco MJ2 Browns
- Main mouse: Razer Mamba
- Favorite switch: MX Browns
- DT Pro Member: -
Thanks, the threading was done manually, by my dad (while I was watchingmtl wrote:Excellent progress, Zifle! How did you thread the bottom layer? That looks like the way to go.

It definitely wasn't the easiest task, as Matt3o also warned me about prior to getting the plate cut. It did end up working, however, and I'm very happy with the result.
For the record, my keyboard ended up at 1360g! With a little skill, I should be able to murder someone with it...
I can't wait to see how your project turns out, mtl, I've been interested in a small keyboard with trackpoint and mouse buttons, ever since I saw the [ulr=http://www.guru-board.com/]Mini-guru[/url], so it's awesome to see someone take it all the way!
-
Broadmonkey

- Fancy Rank
- Location: Denmark
- Main keyboard: Whitefox
- Main mouse: Zowie FK2
- Favorite switch: MX Black
- DT Pro Member: -
- Contact:
Your builds are looking really good, Zifle and mtl.
Zifle, was your sides steel or alu? did you tap all the way through all the plates?
Zifle, was your sides steel or alu? did you tap all the way through all the plates?
-
Zifle
- Location: Denmark
- Main keyboard: Filco MJ2 Browns
- Main mouse: Razer Mamba
- Favorite switch: MX Browns
- DT Pro Member: -
Thanks! No, just the bottom plate. And yes, the whole case is steel.Broadmonkey wrote:Your builds are looking really good, Zifle and mtl.
Zifle, was your sides steel or alu? did you tap all the way through all the plates?
-
Muirium
- µ
- Location: Edinburgh, Scotland
- Main keyboard: HHKB Type-S with Bluetooth by Hasu
- Main mouse: Apple Magic Mouse
- Favorite switch: Gotta Try 'Em All
- DT Pro Member: µ
Some awling later and I have my case all bolted up nice and tight, without its earlier flexing. The alignment is actually pretty super and Matt's ambitious stepped + hidden screw design seems to be flawless! The whole thing's shiny from every angle. Quite distracting while working on it! Sweet.
My Teensies haven't arrived yet, so the hard stuff is all to come. I'll leave the case all bolted up in the meantime to train it to its true shape.
Matteo sent me two Mini USB sockets. One is a bare bones little thing like these:

And the other is a rather handsome one of these:
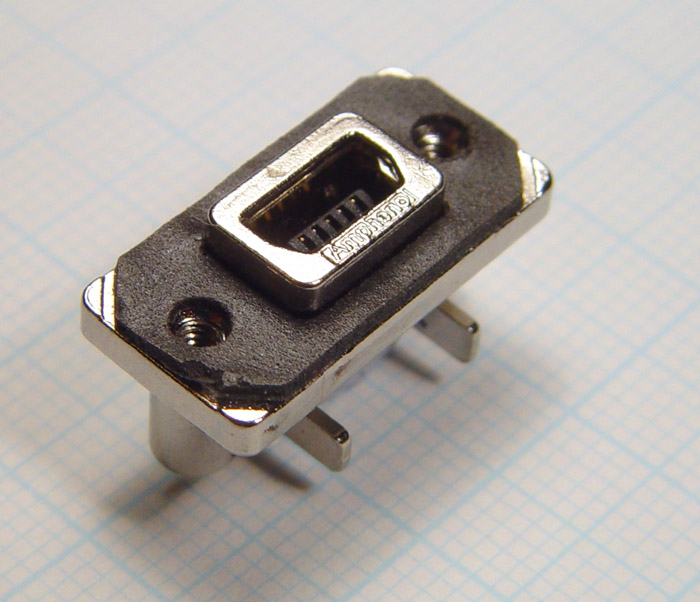
I like the big one — more shiny! — but I might just stick to the small one, which almost fits the lasered notch already. The big one needs a wider notch and quite a bit of expansion to area around the hole. Depends how the filing goes.
My Teensies haven't arrived yet, so the hard stuff is all to come. I'll leave the case all bolted up in the meantime to train it to its true shape.
Matteo sent me two Mini USB sockets. One is a bare bones little thing like these:
And the other is a rather handsome one of these:
I like the big one — more shiny! — but I might just stick to the small one, which almost fits the lasered notch already. The big one needs a wider notch and quite a bit of expansion to area around the hole. Depends how the filing goes.
-
mtl
- Location: USA
- Main keyboard: Custom
- Main mouse: IBM TrackPoint IV
- Favorite switch: Cherry MX Clicky
- DT Pro Member: -
I like that big shiny one. Was looking into one of those as well, but gave up on trying to design the hole for it. Good luck with the filing!
I've updated the imgur photo stream with some new pics. Some of the components were mounted to the bottom layer, including the USB port, and there are close ups of the modified LED switches.
I am procrastinating on the matrix wiring. Matt3o, did you melt the column wires to expose the solder points? Or is there a better way to strip those areas?
I've updated the imgur photo stream with some new pics. Some of the components were mounted to the bottom layer, including the USB port, and there are close ups of the modified LED switches.
I am procrastinating on the matrix wiring.
-
matt3o
- -[°_°]-
- Location: Italy
- Main keyboard: WhiteFox
- Main mouse: Anywhere MX
- Favorite switch: Anything, really
- DT Pro Member: 0030
- Contact:
Don't give up! The small one is just the "panic" backup solution.Muirium wrote:I like the big one — more shiny! — but I might just stick to the small one, which almost fits the lasered notch already. The big one needs a wider notch and quite a bit of expansion to area around the hole. Depends how the filing goes.
the best way I could find is with a sharp cutter (a scalpel actually). But I use pretty thick wires. If the plastic is thin I guess you can simply melt it. The alternative is to use 4-5 short wires per column, but it's a longer process imho.mtl wrote:I am procrastinating on the matrix wiring.
-
Muirium
- µ
- Location: Edinburgh, Scotland
- Main keyboard: HHKB Type-S with Bluetooth by Hasu
- Main mouse: Apple Magic Mouse
- Favorite switch: Gotta Try 'Em All
- DT Pro Member: µ
A panic backup? I like your thinking. With enough work, I should be able to get the big shiny one in place. Besides, my various Teensy projects always have uses for spare sockets of either size.
Nice galleries, guys. Zifle's got a nice clean steel board all hooked up and ready to go while I'm twiddling my thumbs, waiting on Teensies. I like the slimline outer edge and tight corner screws. And MTL's definitely ahead on the creative lighting side, making me wonder what colours those RGBs are going to shine when in use. I'd certainly like to delve into you of your excess stock from the original 100!
By the way, you guys aren't soldering up your matrices with the keyboard's weight resting on the switches, are you? Matt warned me against that, especially with clicky MX like my greens. The heat can mess up their mechanism pretty quick, when the slider is close.